GRAPHICS User Guide
Overview
Graphics+ is a fully integrated graphics platform within Frequency Studio that transforms how you create, schedule, and automate on-screen graphics for your streaming channels. This comprehensive solution is designed to elevate your streaming channels with professional and captivating visual elements. You can create, schedule, and automate a diverse array of graphics—from static overlays to dynamic motion graphics and advanced video manipulations like squeezebacks without introducing operational complexity.
Graphics+ enables end-to-end Motion Graphics workflows:
Create, schedule, and deploy static and motion graphic elements, overlays, and effects—including PNG/JPG overlays, dynamic motion graphics (Lottie/WebM), and advanced video manipulation (credits squeezebacks, L-bars, PiP).
Automate placement and timing via rule-based scheduling, metadata triggers, and rundown previews, with WYSIWYG visualization.
Monetize with branded graphics, ad-friendly layouts, and dynamic sponsorship integrations, all while maintaining brand consistency and production quality.
Graphics+ is available in three packages:
Static: Simple PNG/JPG overlays for logos, banners, and bugs.
Dynamic: Lottie or WebM-based motion graphics supporting dynamic text and metadata-driven visuals.
Enhanced: Advanced video manipulation (squeezebacks, PiP, multi-zone layouts) with full automation.
With Graphics+ running entirely inside Frequency Studio, you can drive higher engagement, streamline execution, and unlock new monetization opportunities directly from your existing workflow.
Graphics+ Benefits
Integrating Graphics+ into your workflow provides tangible benefits that boost viewer engagement, streamline operations, enhance monetization, and reinforce brand consistency.
Increased Viewer Engagement - Dynamic visuals captivate your audience, keeping viewers tuned in longer:
Visually Engaging Moments: Animated lower thirds, branded credit squeezes, Picture-in-Picture (PiP), and "Now/Next/Later" overlays turn routine transitions into engaging moments, significantly reducing viewer drop-off.
Consistent Branding: High-quality, uniform visuals across your programming reinforce brand identity, boosting brand recall by up to 35%.
Creative Storytelling: Utilize end-of-show credits as promotional opportunities, effectively teasing upcoming content and maintaining viewer interest.
Proven Retention Boost: Integrated dynamic graphics, as demonstrated by Forrester research, can enhance viewer engagement by up to 25%.
Operational Efficiency - Graphics+ automates graphic management, making your workflows smoother and more efficient:
Unified Platform: Manage all graphics directly within Frequency Studio, eliminating the need for external tools or separate operators.
Automated Scheduling: Leverage rule-based triggers (e.g., at program starts, before ad breaks) to automatically place graphics precisely when needed, reducing manual intervention.
Real-Time Updates: Easily automate dynamic graphics updates driven by program metadata (titles, showtimes, live data), significantly cutting manual workloads.
Creative Self-Service: Empower your team to maintain creative control without additional design tools or external dependencies.
Monetization Opportunities - Graphics+ creates innovative, unobtrusive ad placements to maximize revenue:
Non-Disruptive Formats: Sponsored overlays, L-bars, and PiP ad placements integrate seamlessly into your content without interrupting viewer experience.
Interactive Revenue: Utilize interactive elements such as QR codes, live polls, and clickable overlays to convert viewer interactions directly into monetization streams.
Increased Sponsorship Value: Customizable frames and branded PiP segments create premium sponsorship opportunities, potentially boosting ad revenue by up to 18% (TripleLift data).
Brand Consistency - Graphics+ ensures your brand remains consistently and effectively presented:
Uniform Visual Templates: Deploy consistent Program Templates or Trigger Packages across all content, ensuring visual coherence.
Real-Time Previews: Instantly preview graphics through intuitive WYSIWYG functionality, eliminating post-deployment adjustments.
Flexible Deployment: Trigger graphics precisely when and where you need them—not limited to fixed breaks—maximizing brand visibility and consistency.
Getting Started
Graphics+ empowers you to create and deploy high-impact visual experiences directly within Frequency Studio. Before walking through the step-by-step instructions with screenshots, it’s important to understand the key stages in the workflow and the options available at each stage.
Prepare Graphics Assets
Start by preparing the visual assets you want to use for your channel graphics. Graphics+ supports a range of file types for different use cases:
Static Overlays: Use high-quality PNG files (with transparency) for channel logos, banners, bugs, and call-to-action graphics.
Dynamic Motion Graphics: Author animated compositions in Adobe After Effects and export them as Lottie JSON files (Bodymovin) for metadata-driven overlays, or as WebM files for motion graphics with transparency.
Enhanced Video Graphics: For advanced layouts (like squeezebacks, L-bars, or Picture-in-Picture), prepare the necessary PNG assets, ensuring all dimensions and formats match the requirements for your intended use (typically 1920x1080). Click here to learn more about the Squeezeback background dimensions.
Once your assets are ready, navigate to the Graphics tab in Frequency Studio. Here, you’ll upload your assets and configure them as Graphics Compositions—modular building blocks that define how your graphics will appear and behave on-screen.
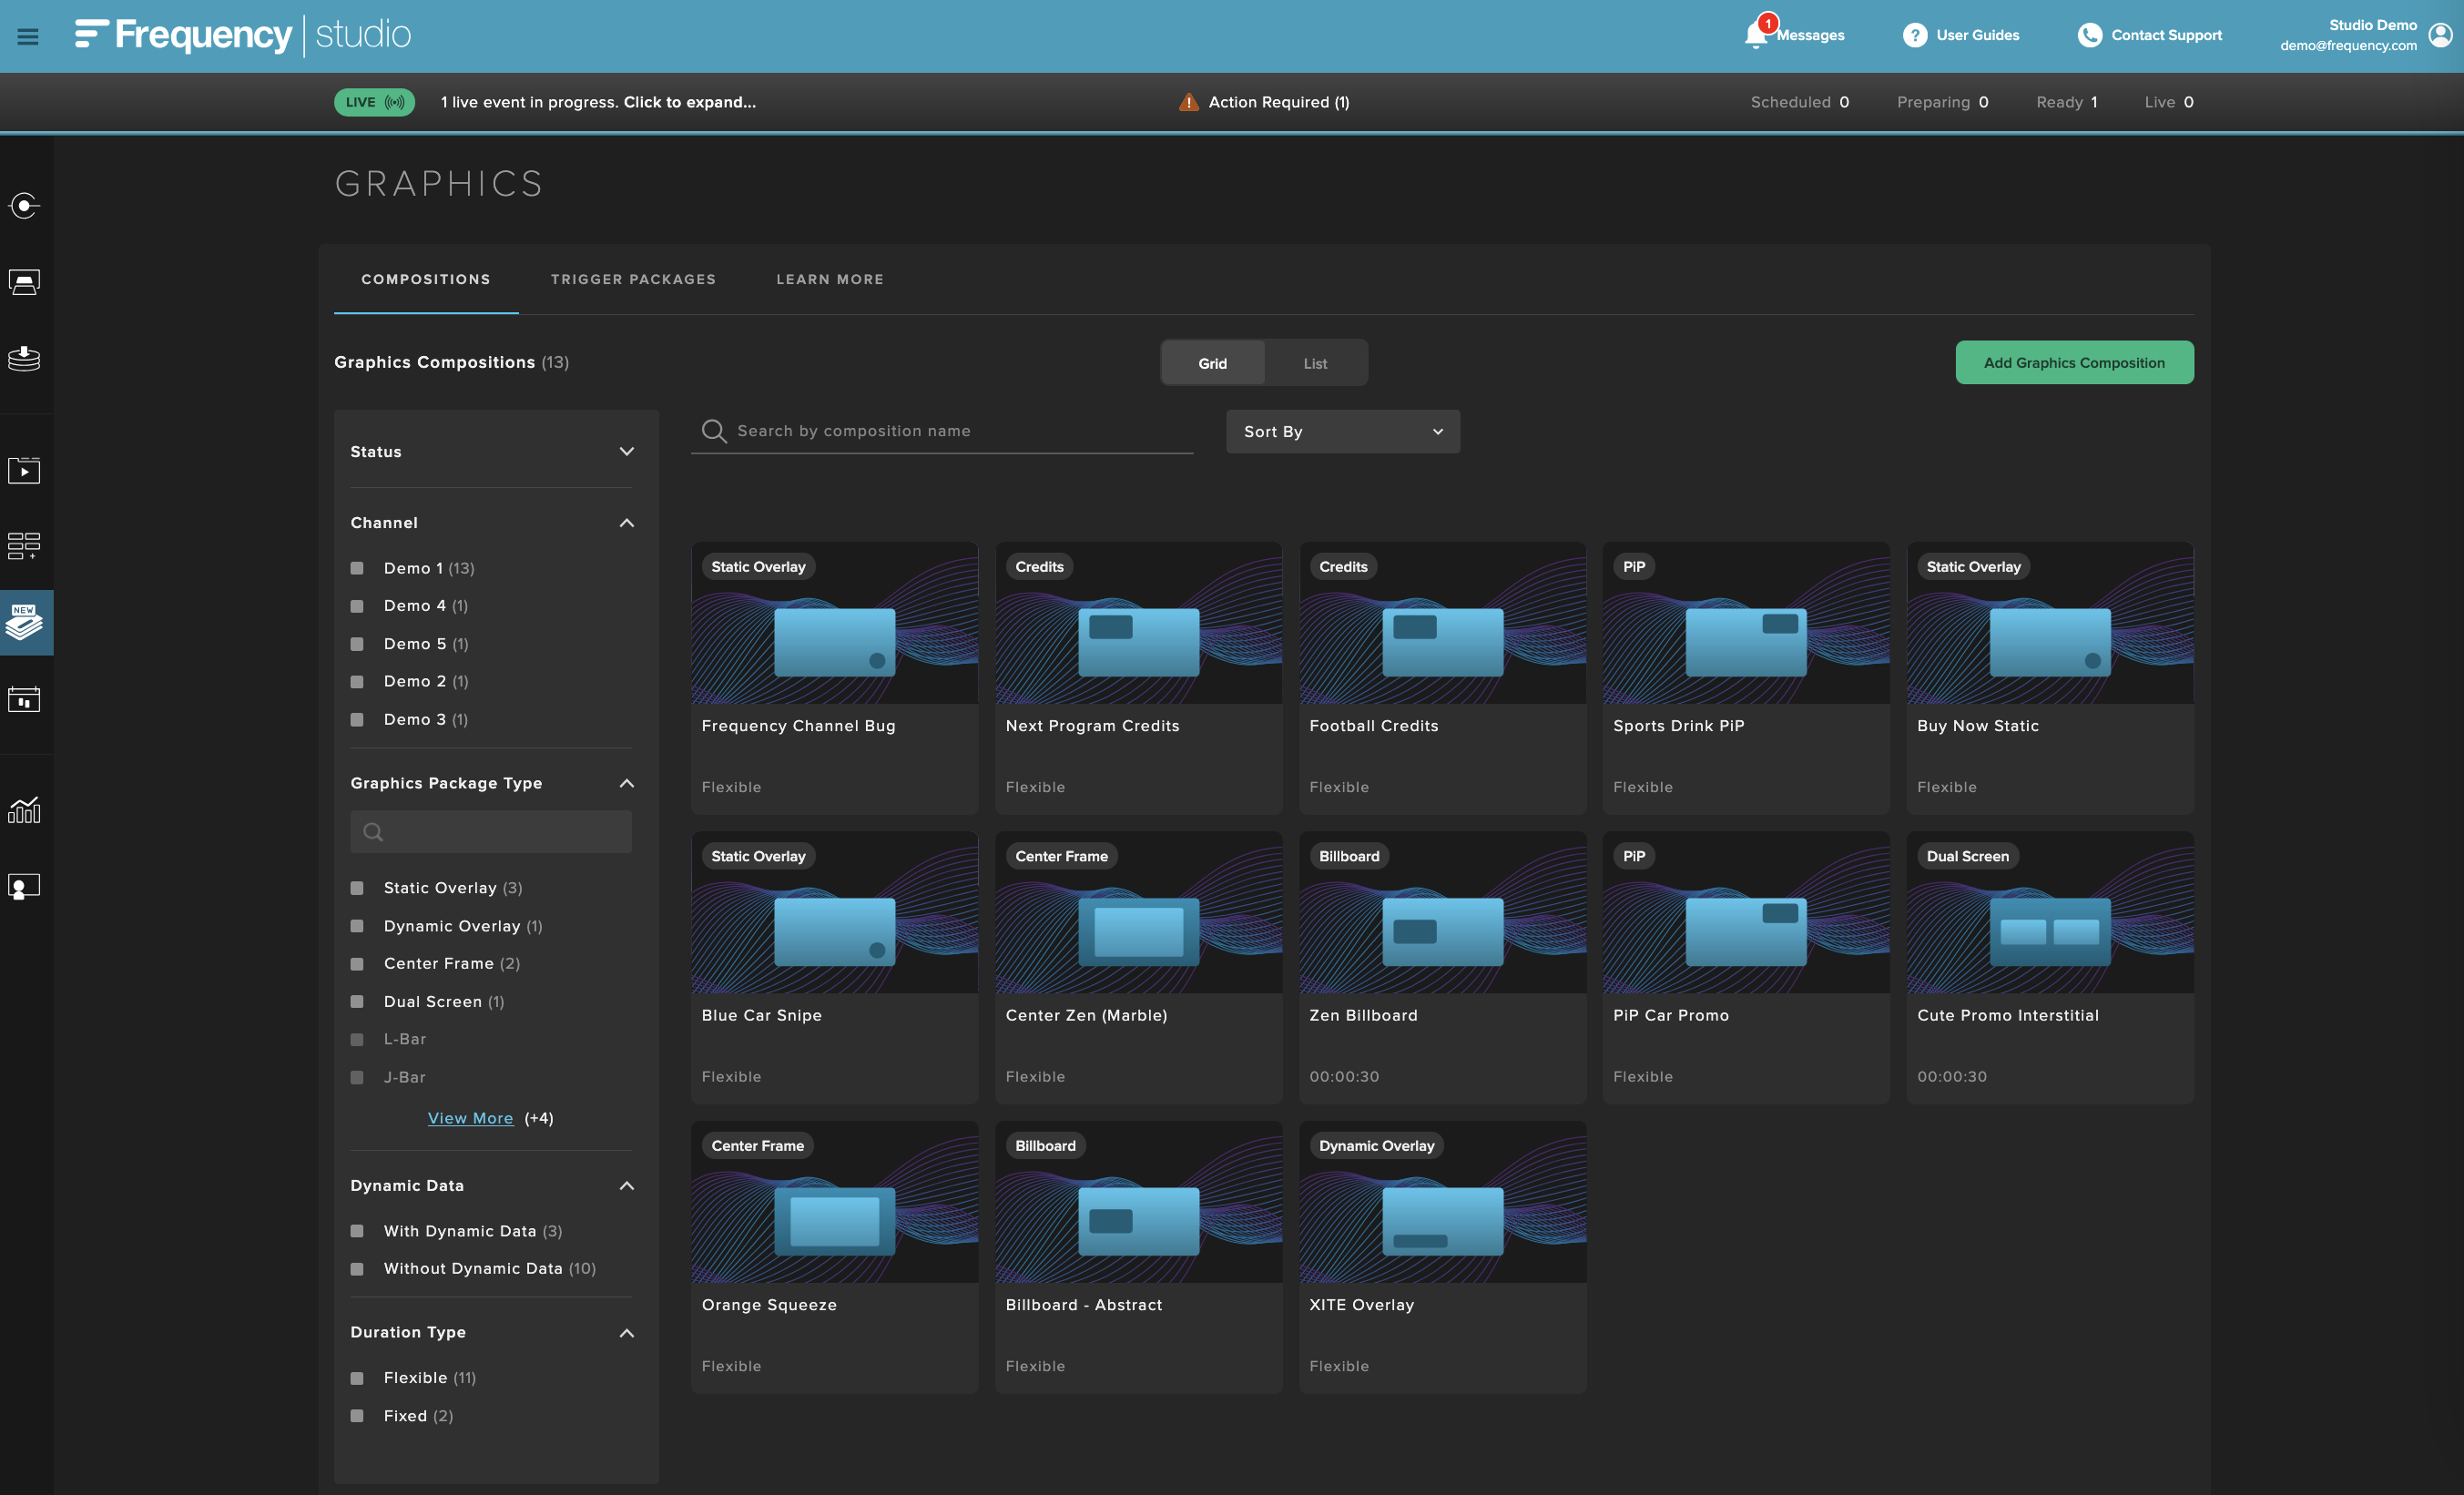
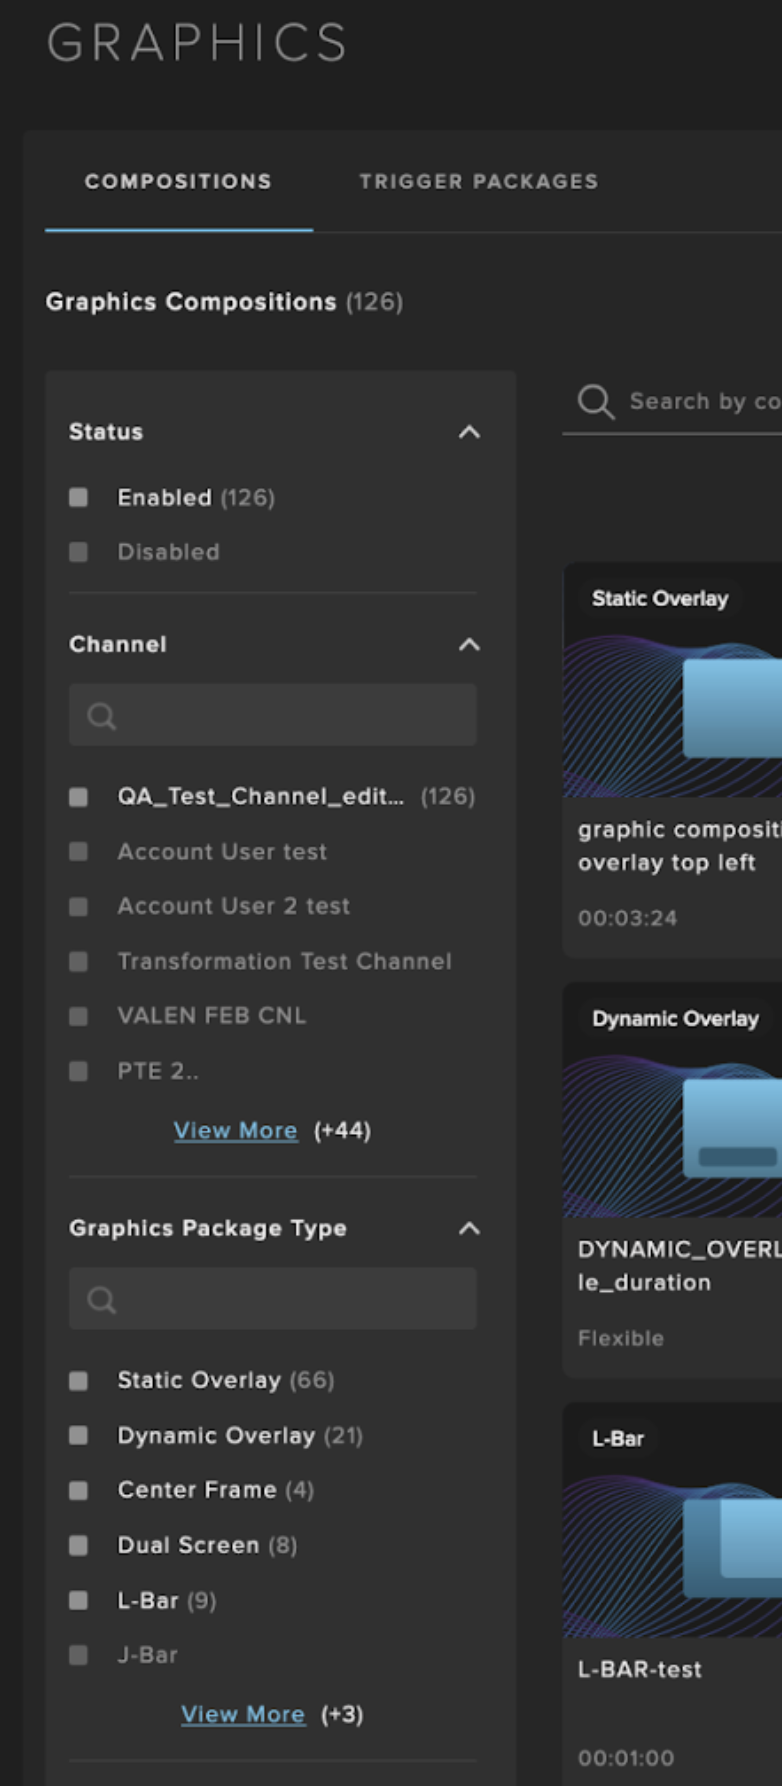
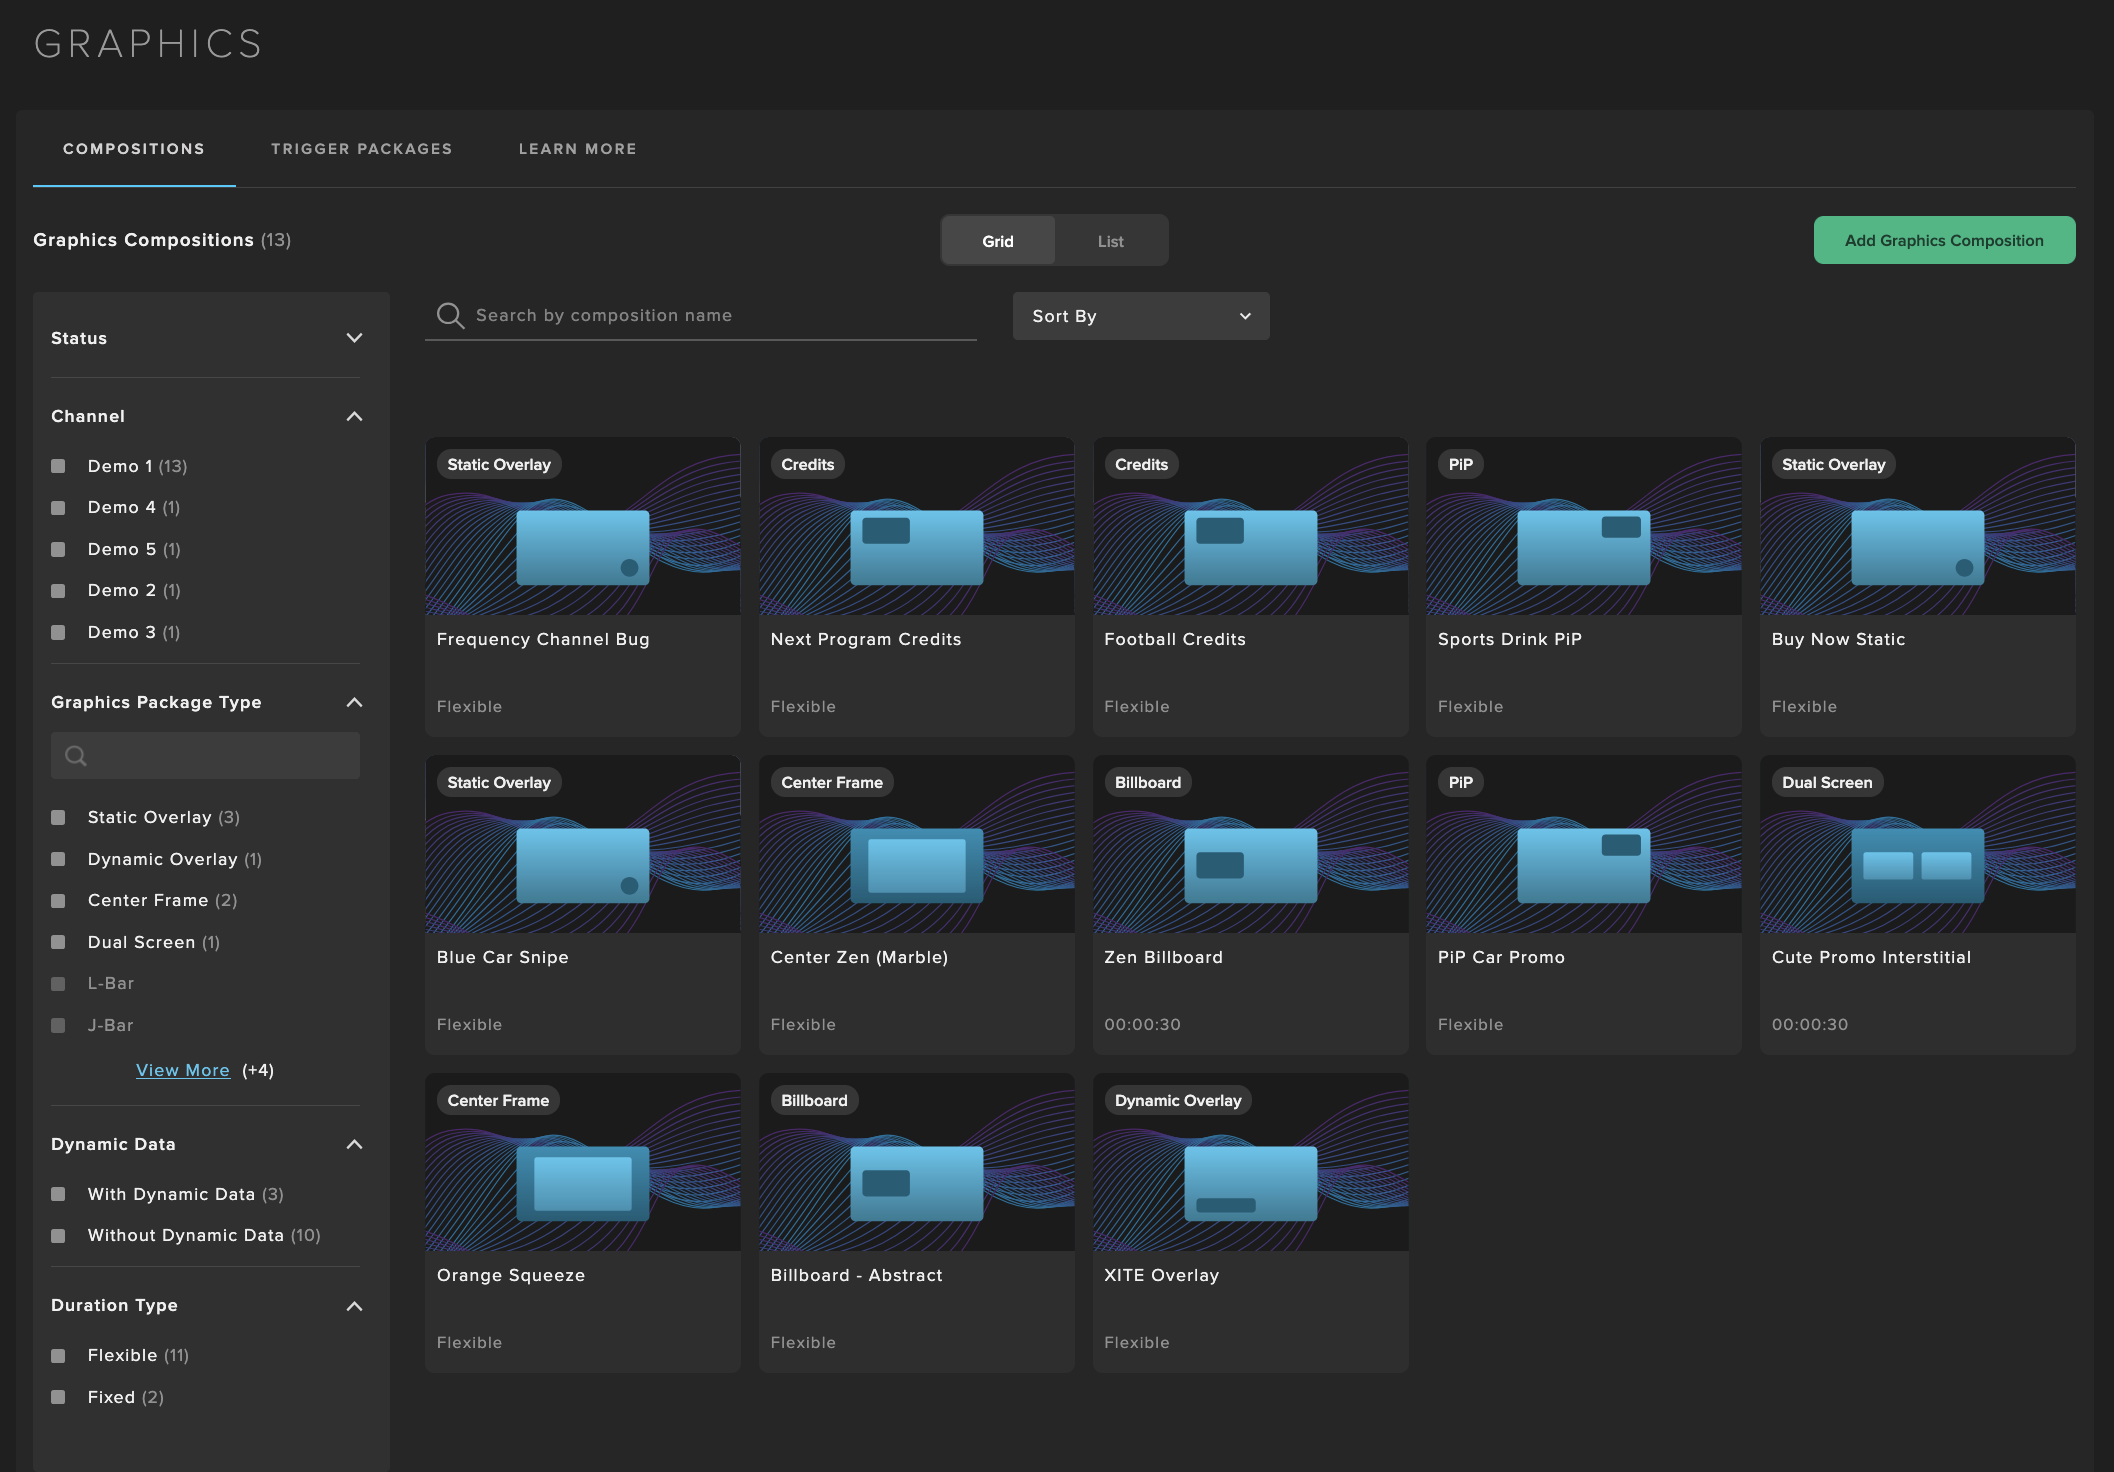
Manage Graphics Compositions
In the Graphics tool within the Compositions tab, you will see all of your account’s Graphics Compositions. On the left side, you can use the filtering tools to organize and browse through your library of Compositions.
Within the Search box, you can narrow your results by Graphics Composition Title. Results can be sorted by Name and Dates.
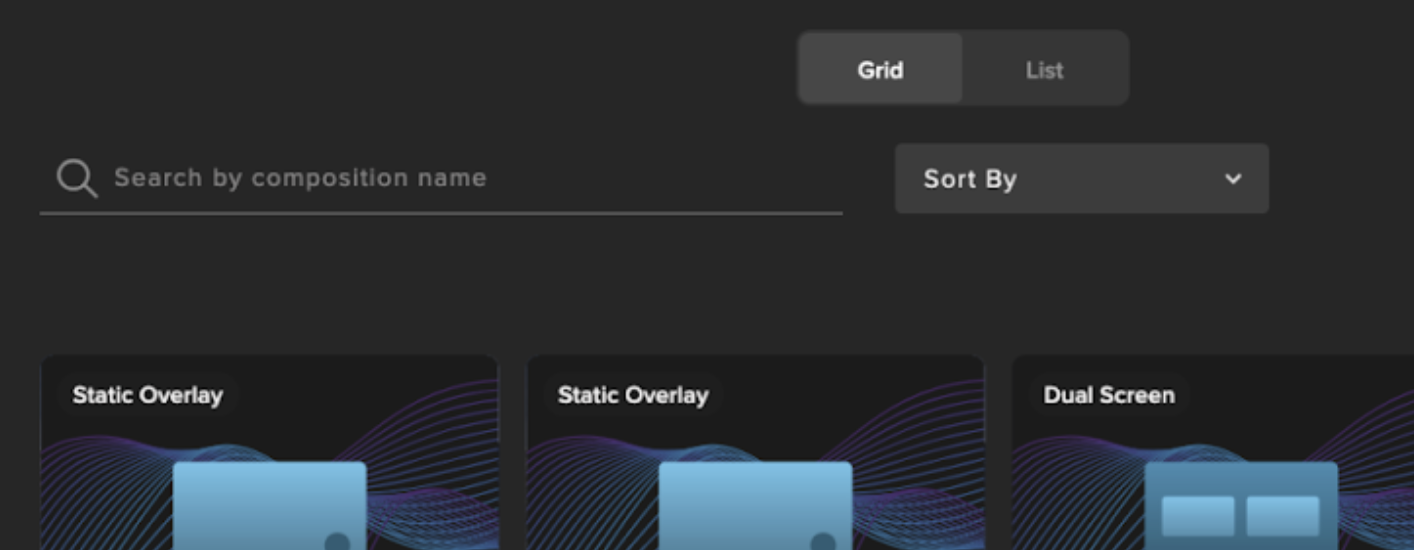
Results can be viewed in Grid or List view.
Set up Graphics Compositions
In the Graphics tool, set up one or more Compositions by clicking on "Add Graphics Composition":
Choose the desired Graphics Composition Type:
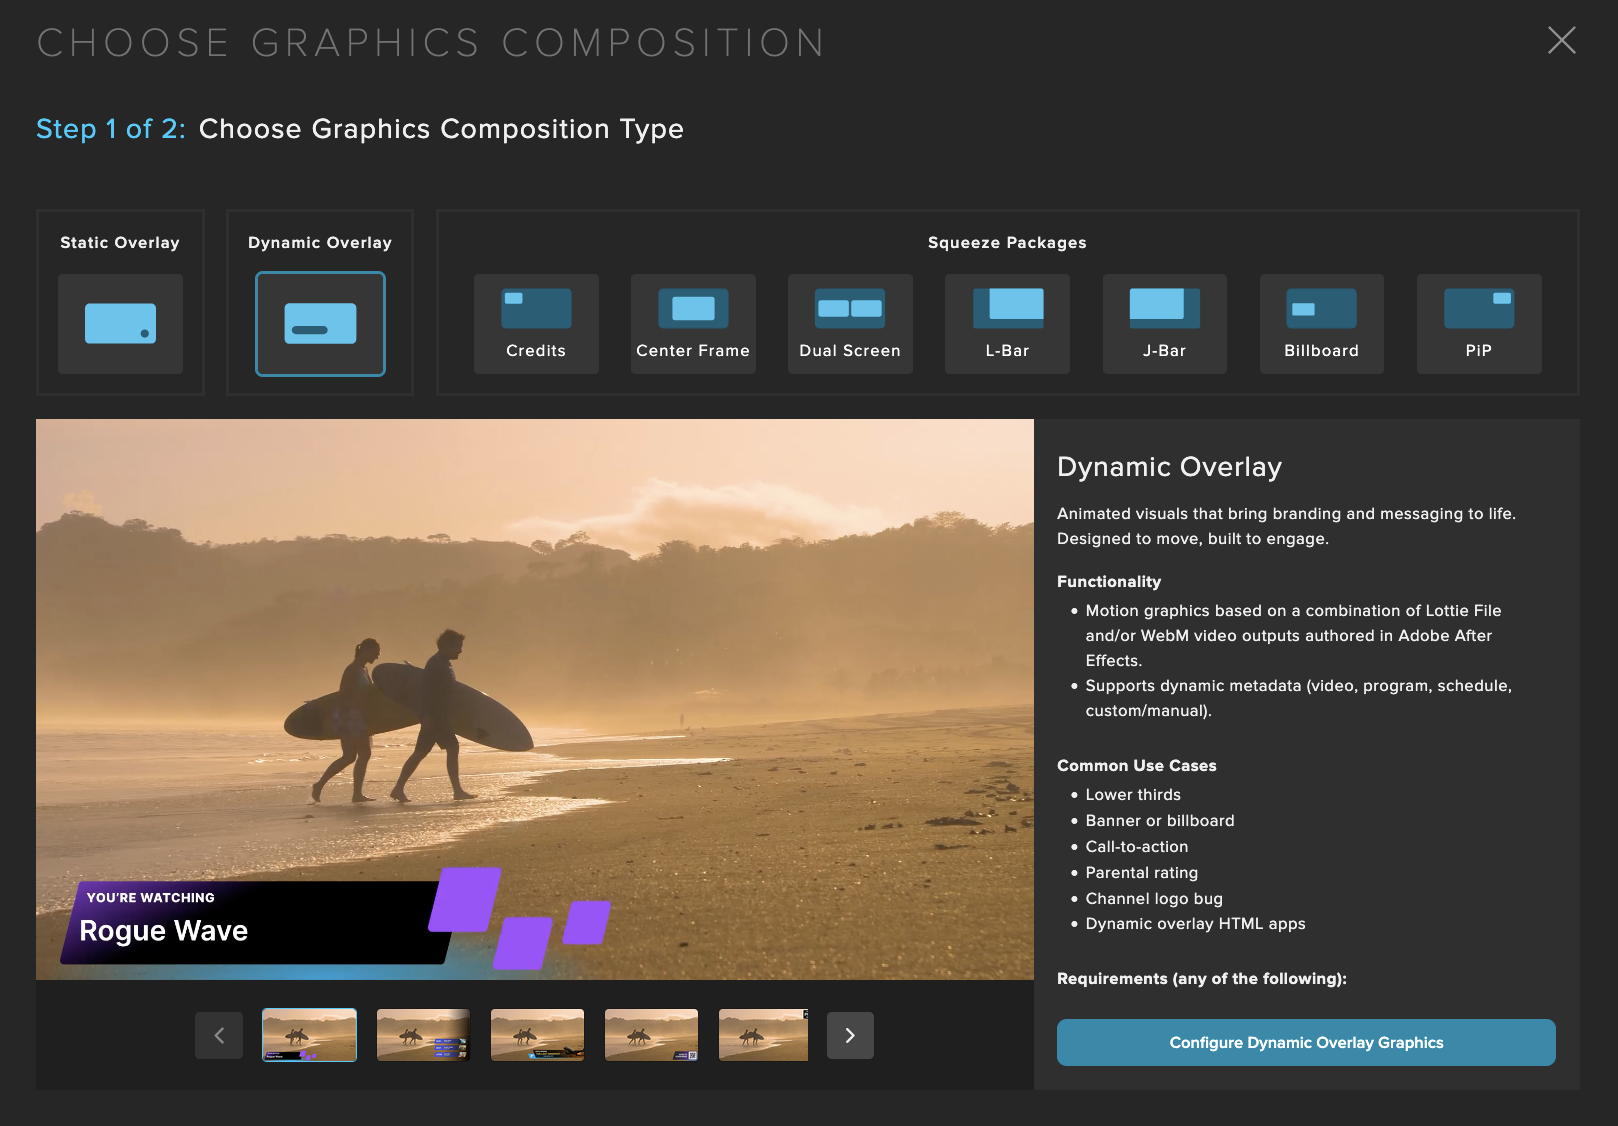
Frequency Supports a variety of composition types, including static, dynamic and squeezebacks.
Note
Although these Graphics Compositions can be used to schedule into your channels, the channels must be configured to support specific Graphics tiers (Standard, Dynamic, Enhanced) for graphics playout.
Test and preview each Composition to ensure it renders correctly in the Studio environment and displays as expected on your intended devices.
Static Overlay
Branded visual for identification and messaging. No motion, just impact.
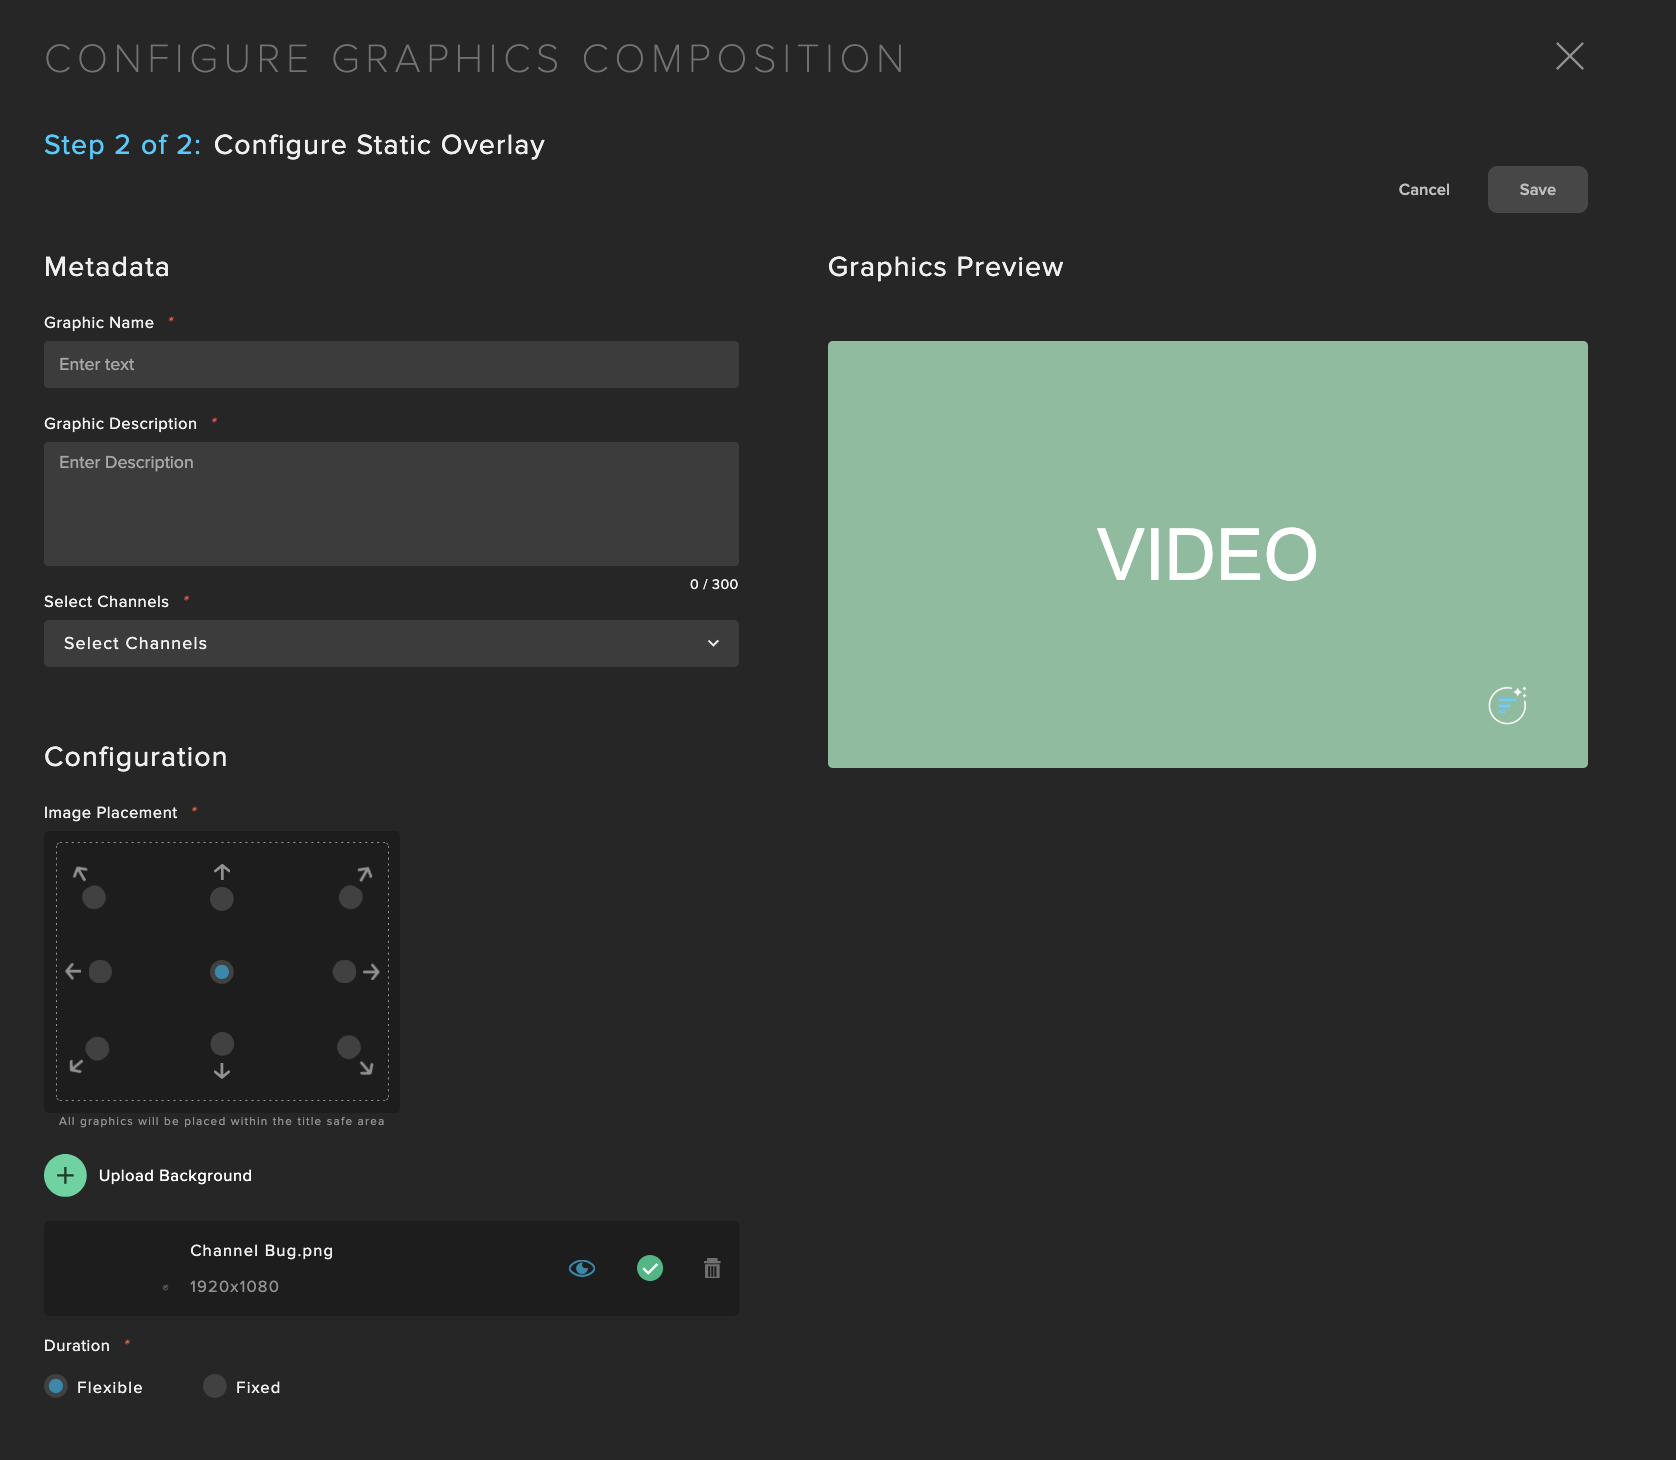
Fields that can be configured:
Graphic Name: Use a meaningful title that will allow easy identification of the graphic.
Graphic Description: Any additional details that may not fit into a title.
Image Placement: Choose how the artwork will be presented in the video canvas. For full-frame artwork, choose the center placement. Otherwise, choose a position within the screen (e.g. top-right corner). Image placement for non-full-frame artwork will be placed within the title-safe area of the video canvas.
Duration: Flexible means that when this Composition is used during Graphics scheduling, the scheduler can choose the final runtime duration. Fixed will set a duration in which it always be used during Graphics scheduling for this Composition.
Dynamic Overlay
Animated visuals that bring branding and messaging to life. Designed to move, built to engage.
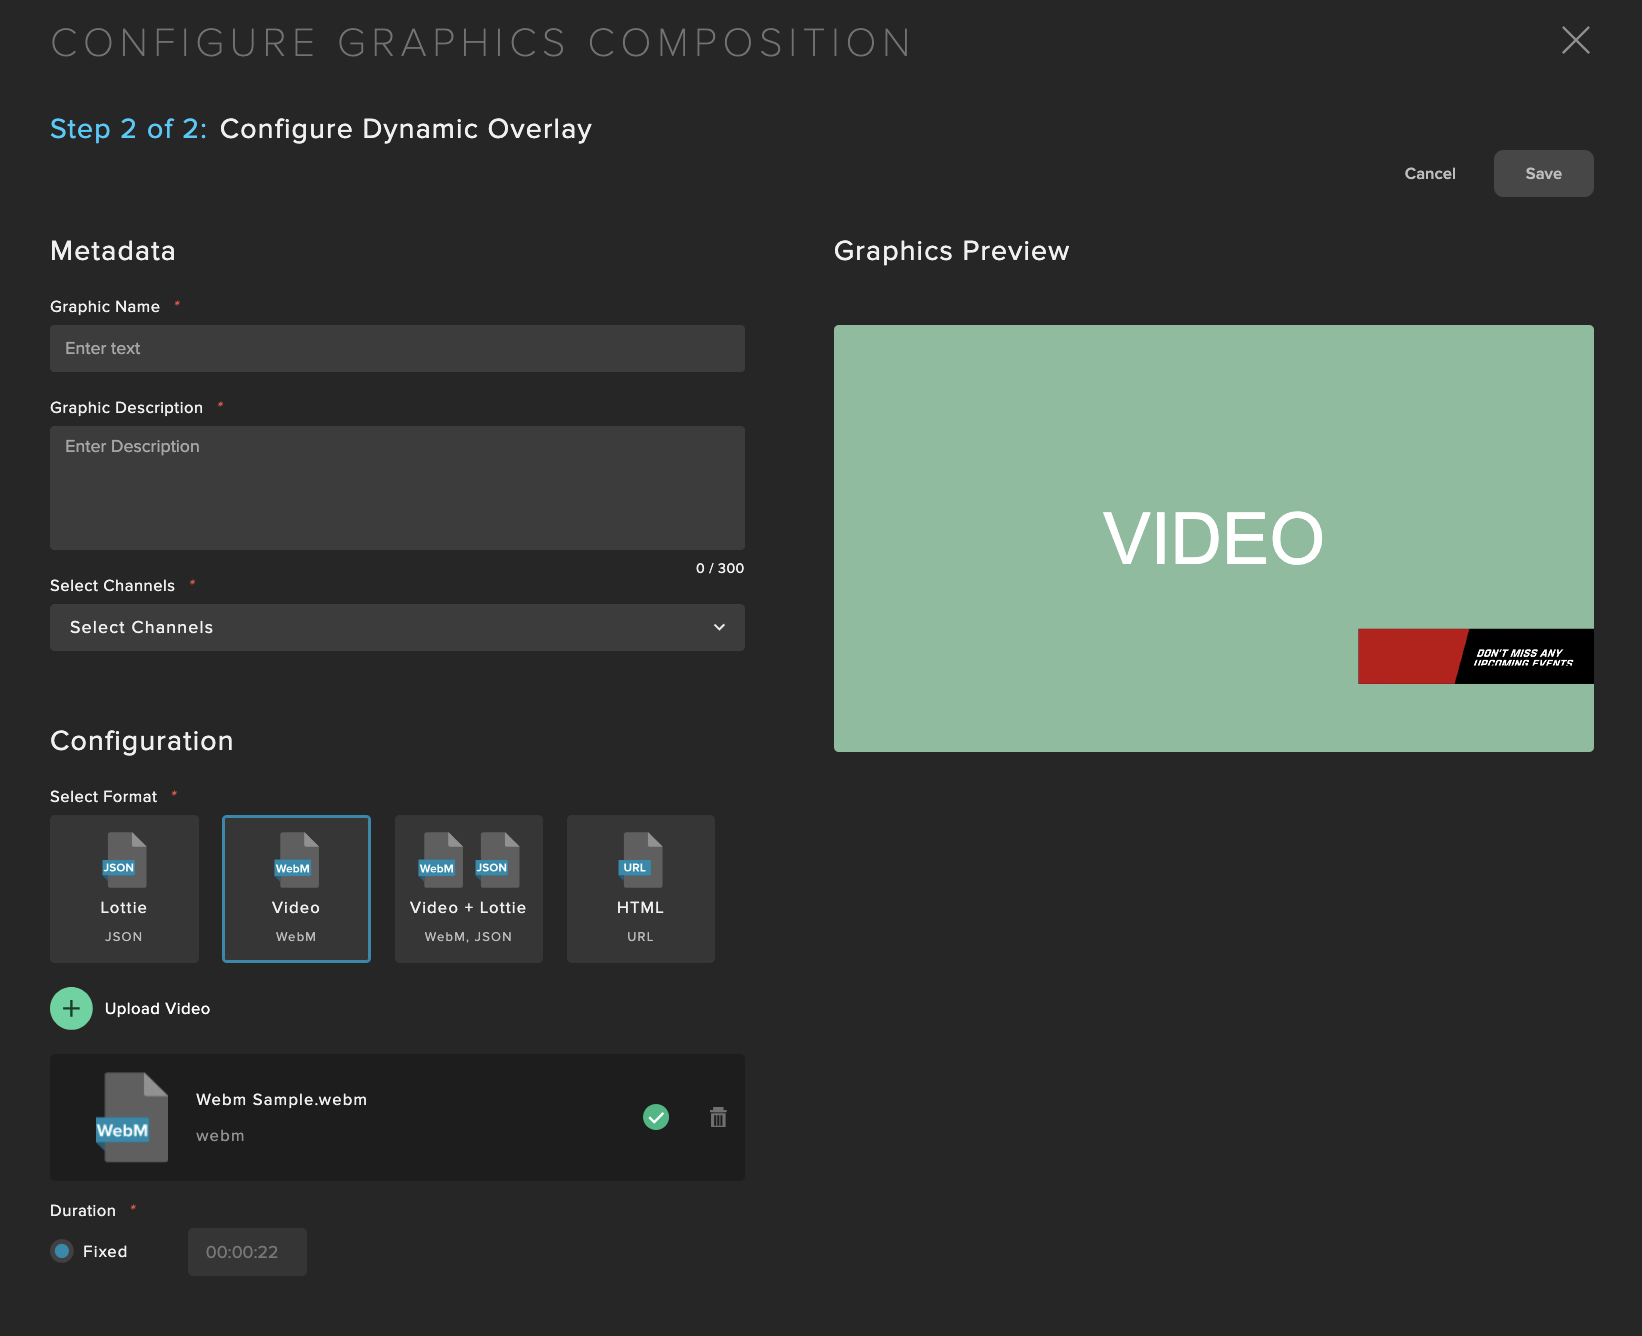
Fields that can be configured:
Graphic Name: Use a meaningful title that will allow easy identification of the graphic.
Graphic Description: Any additional details that may not fit into a title.
Select Channels: Select the linear channels that this graphic will be available to use in
Upload Graphics Asset(s): Select the format and upload the appropriate assets.
Lottie: Dynamic motion and metadata (JSON, sidecar files, or ZIP). When exporting with the Bodymovin plugin use the following settings:
Deselect "Glyphs," use "Bundle Fonts,"
Compression Off (optional)
Pretty Print JSON (optional)
Before uploading, Zip the JSON output with the "Images" folder. This contains your fonts and is necessary if they are to be correctly displayed.
Video: Proprietary/advanced motion effects, but no dynamic metadata (WEBM with alpha channel)
HTML: HTTPS URL for a custom overlay of HTML app over video stream, such as a news ticker
Duration: Flexible means that when this Composition is used during Graphics scheduling, the scheduler can choose the final runtime duration. Fixed will set a duration in which it always be used during Graphics scheduling for this Composition. For WebM formats, the duration must be Fixed to ensure that the entire video is played back without interruptions.
Dynamic Data: If using a Lottie (JSON) file, input the text value(s) in the Lottie file to be replaced with dynamic metadata from Frequency. For example, "SERIES_VALUE" in the Lottie file could be replaced with the Frequency Series metadata.
HTML and Tickers
Active and real-time elements, such as news tickers, can be managed using dynamic overlays with HTML5 and CSS.
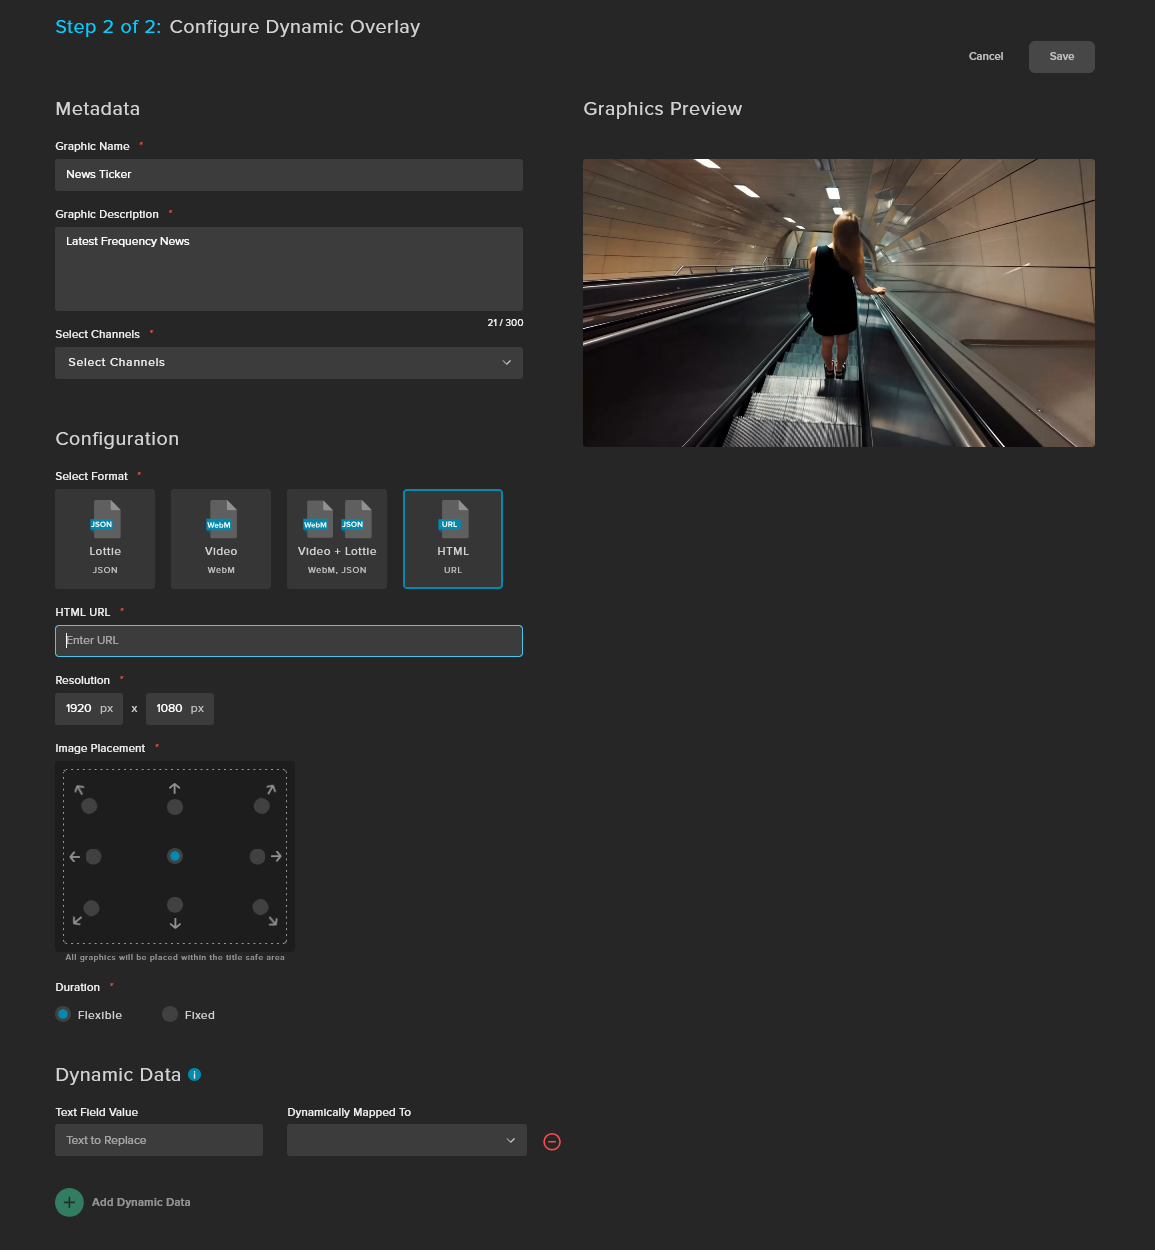
Fields that can be configured:
Graphic Name: Use a descriptive title for easy identification of the graphic.
Graphic Description: Add any details that may not fit in the title.
Select Channels: Select the linear channels where this graphic will be available.
HTML URL: The HTTPS link (required) to your HTML5 overlay.
Resolution: The resolution of your overlay element, which will be scaled accordingly based on the Image Placement setting.
Image Placement: Choose how the overlay will be presented on the video canvas. For full-frame artwork, select the center placement. Otherwise, choose a position within the screen (e.g., top-right corner). Non-full-frame artwork will be placed within the title-safe area of the video canvas and shifted in the selected direction.
Duration: Flexible allows a scheduler to choose the final runtime duration when scheduling the graphic. Fixed sets a specific duration that will always be used. For WebM formats, the duration must be set to Fixed to ensure the entire video plays without interruption.
Important
Recommendations and best practices:
Frames should reference the full size of the output (e.g., 1920x1080) and have elements placed accordingly when using the centered image placement.
JavaScript and AppleWebKit/537 are fully supported.
The page should automatically load the ticker and has logic to constantly refresh the data in the animation.
The page must contain transparency to allow the linear stream to show through.
Audio is not supported.
WebM is the only supported video format, use the VP9 codec for transparency.
4GB limit of available memory.
Supports rendering up to 60fps.
Squeezebacks
Graphics+ supports a variety of squeezebacks:
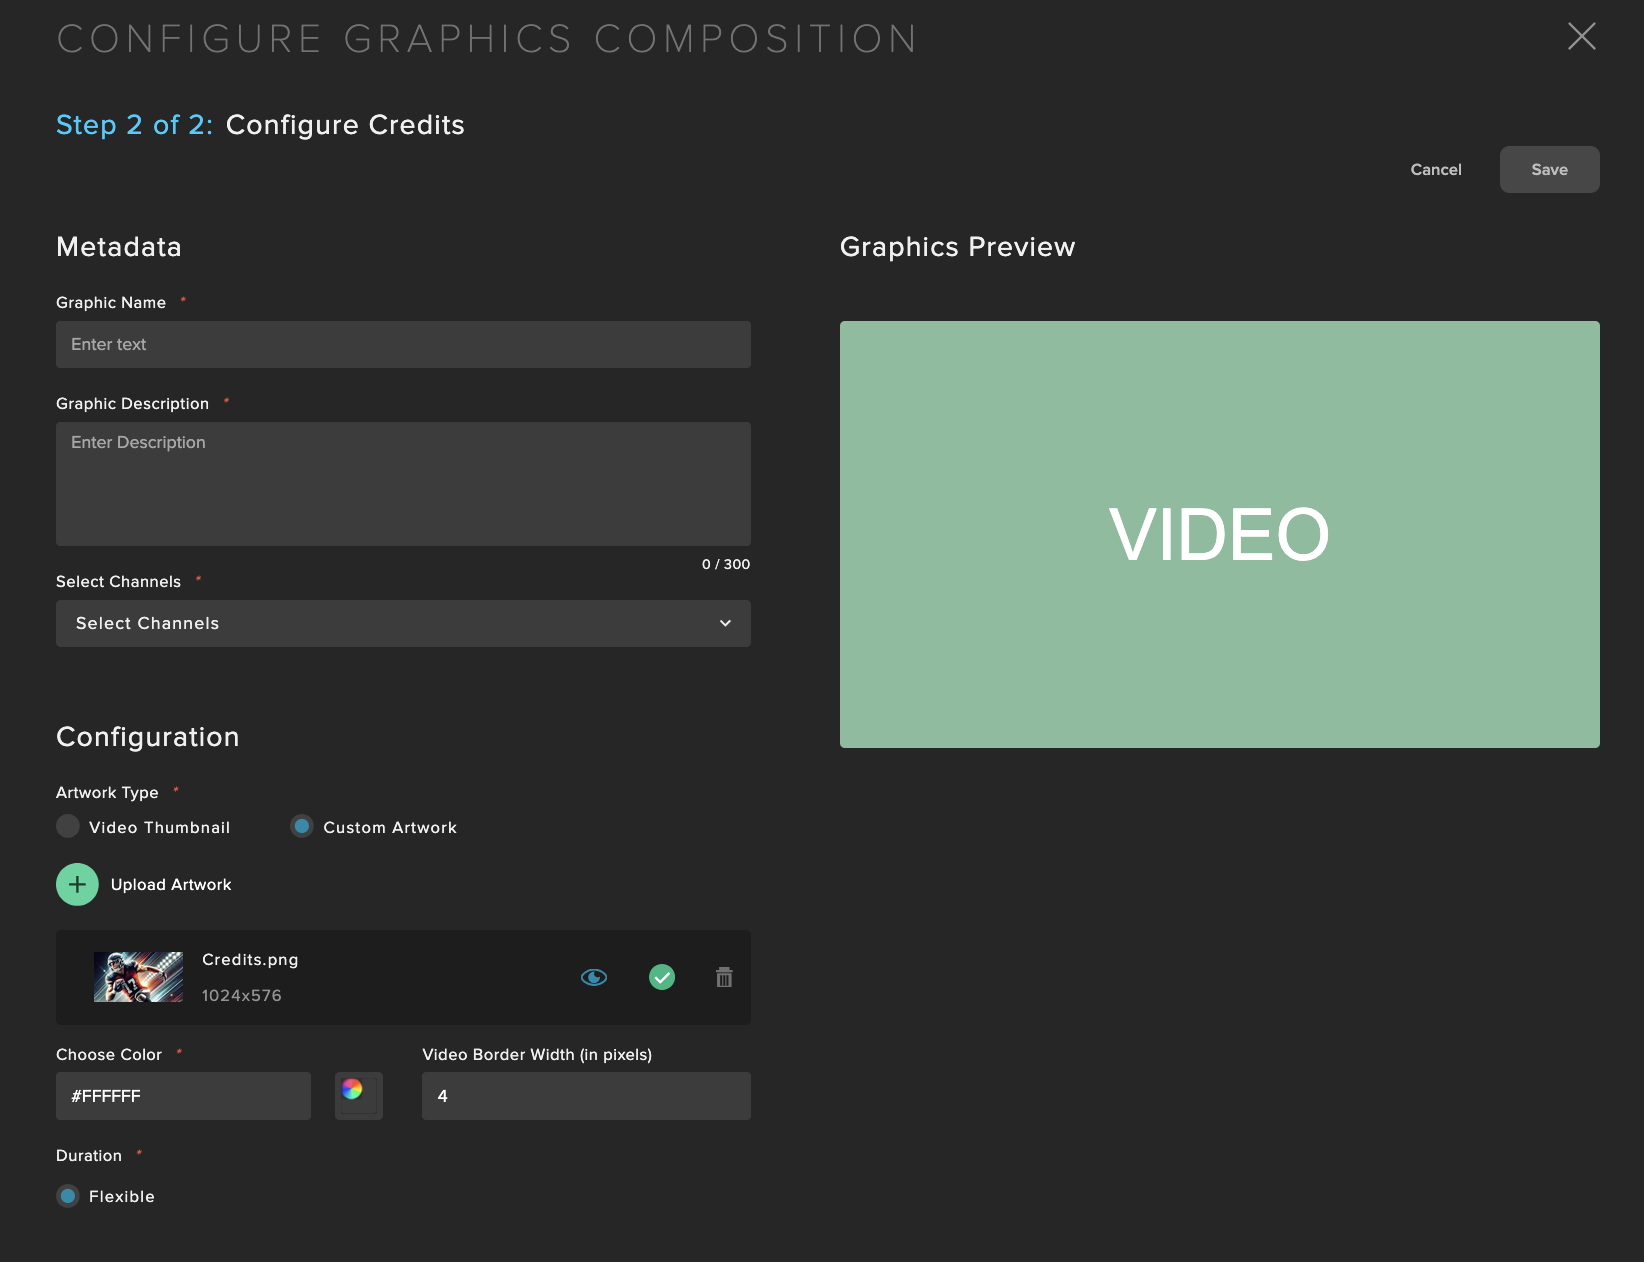
Credits
Transform closing credits to creatively highlight what’s next and keep viewers engaged.
Element | Size | Position |
|---|---|---|
Video | 480 x 270 | (230, 238) |
Background Image | Main Stage: 1920 x 930 Credits Overlay: 1920 x 150 (Bottom) | (0,0) |
Fields that can be configured:
Graphic Name: Use a meaningful title that will allow easy identification of the graphic.
Graphic Description: Any additional details that may not fit into a title.
Select Channels: Select the linear channels that this graphic will be available to use in.
Configure Background: Select the background artwork source. By default, the next scheduled video’s thumbnail is used dynamically. However, a Custom Artwork that uses a static image can be used as well. Supported file types are PNG and JPG.
Configure Border: Define the border color and width that surrounds the video. You can type in the Hex code or use the visual color selector.
Duration: Flexible means that when this Composition is used during Graphics scheduling, the scheduler can choose the final runtime duration. A countdown is used from the final scheduled duration to let the user know how much longer before the next program begins.
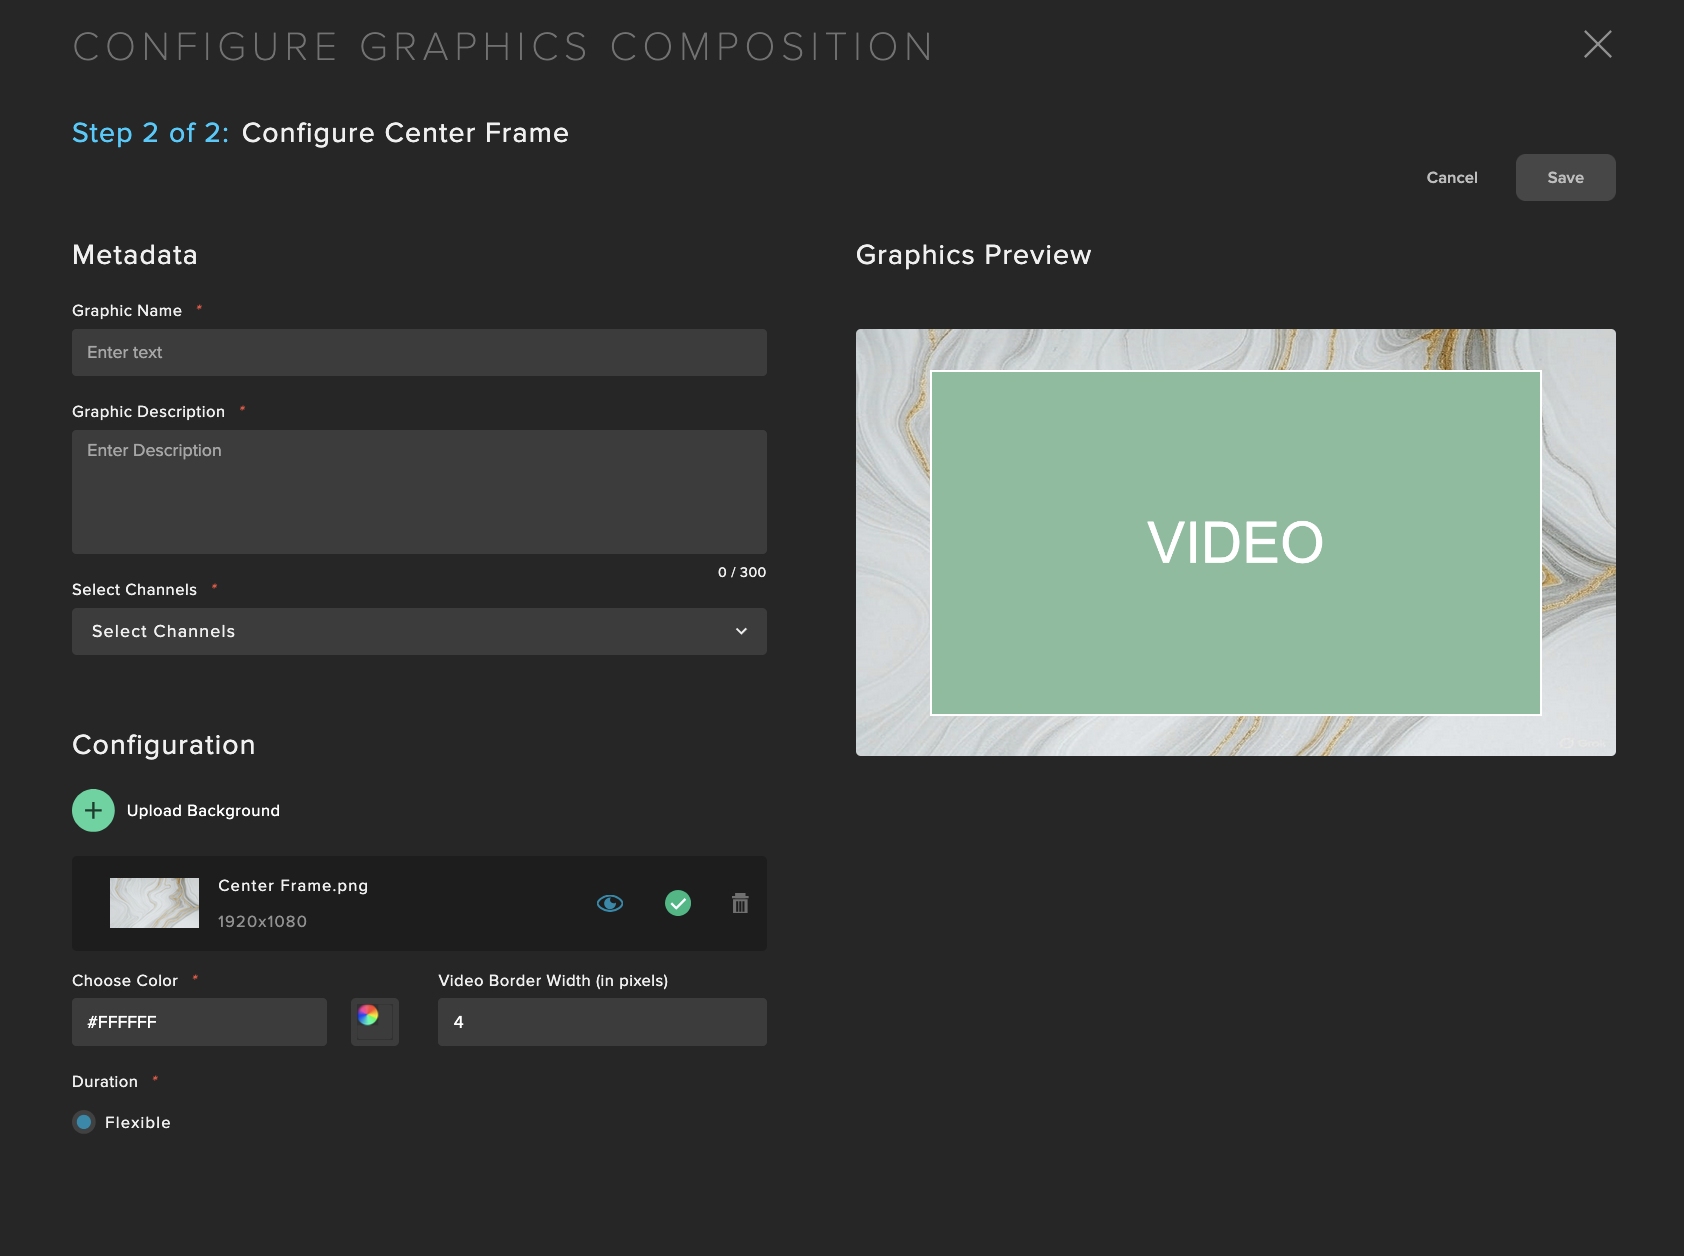
Center Frame
Scale and reposition video to the center to allow for custom visual framing and enhanced on-screen messaging.
Element | Size | Position |
|---|---|---|
Video | 1536 x 864 | (192, 108) |
Background Image | Border: 192px (Left/Right) & 108px (Top/Bottom) | (0,0) |
Fields that can be configured:
Graphic Name: Use a meaningful title that will allow easy identification of the graphic.
Graphic Description: Any additional details that may not fit into a title.
Select Channels: Select the linear channels that this graphic will be available to use in.
Upload Background: Select the background artwork. Supported file types are PNG and JPG.
Configure Border: Define the border color and width that surrounds the video. You can type in the Hex code or use the visual color selector.
Duration: Flexible means that when this Composition is used during Graphics scheduling, the scheduler can choose the final runtime duration.
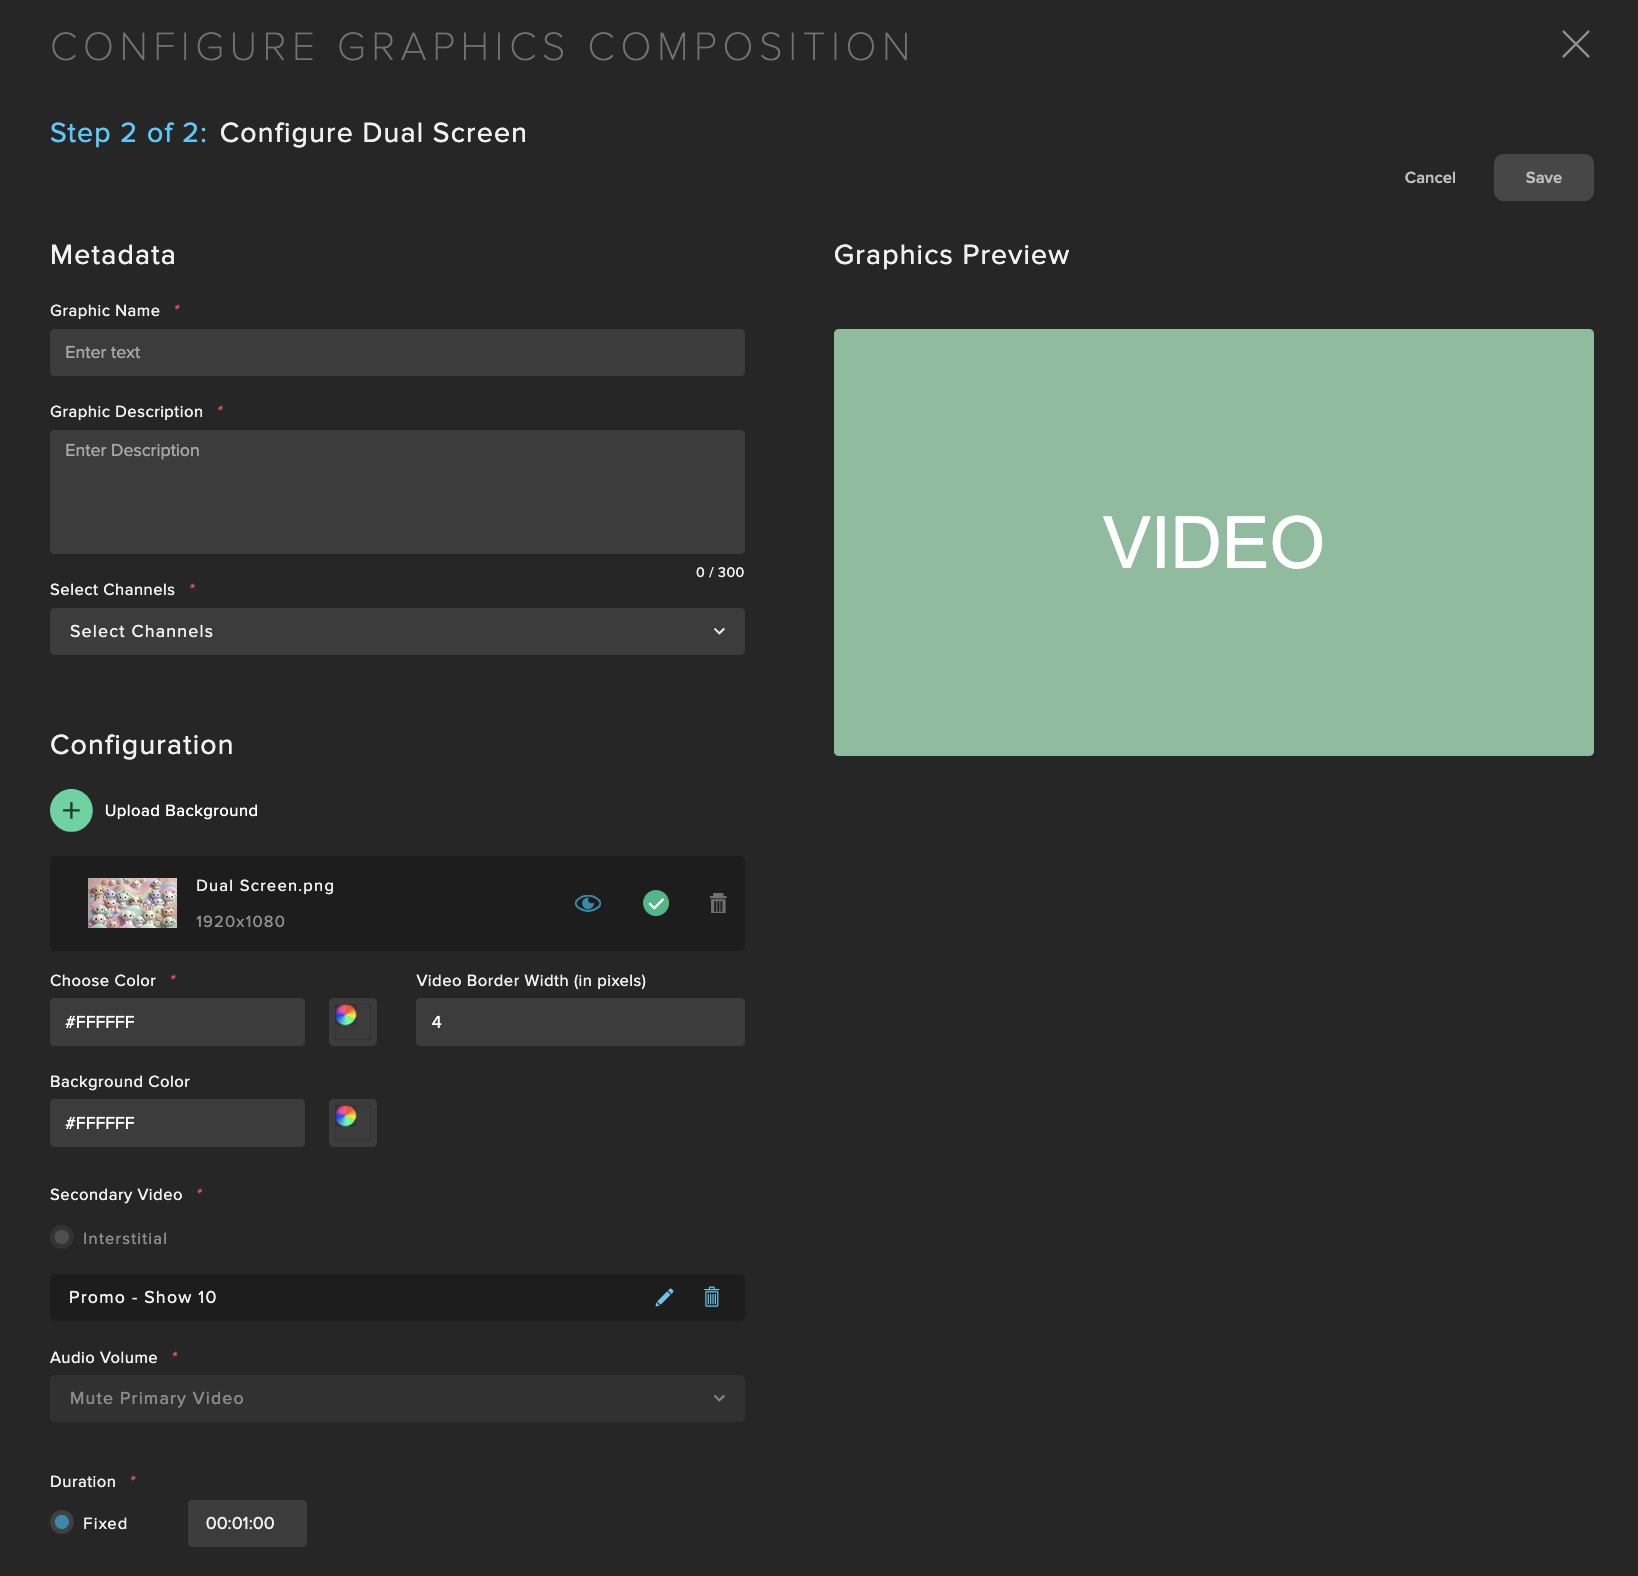
Dual Screen
Scale and reposition video to introduce side-by-side content with branded framing and layered messaging.
Element | Size | Position |
|---|---|---|
Video | Left: 576x324, Right: 998x561 | (732, 412) (964, 548) |
Background Image | Canvas: 1920 x 1080 (Both videos float on background) | (0,0) |
Fields that can be configured:
Graphic Name: Use a meaningful title that will allow easy identification of the graphic.
Graphic Description: Any additional details that may not fit into a title.
Select Channels: Select the linear channels that this graphic will be available to use in.
Configure Background: Either a Background artwork can be uploaded or a flat color can be selected. When uploading a background artwork, PNG and JPG are supported. When using a flat color, you can type in the Hex code or use the visual color selector.
Configure Border: Define the border color and width that surrounds the video. You can type in the Hex code or use the visual color selector.
Secondary Video: Choose the Secondary video from your library. You can either select an Interstitial video or an Interstitial Collection (a set of videos similarly used for Dynamic Interstitials in Programs).
Audio Volume: By default, the Primary video’s audio is muted while the Secondary audio is audible during the squeeze back.
Duration: Flexible means that when this Composition is used during Graphics scheduling, the scheduler can choose the final runtime duration.
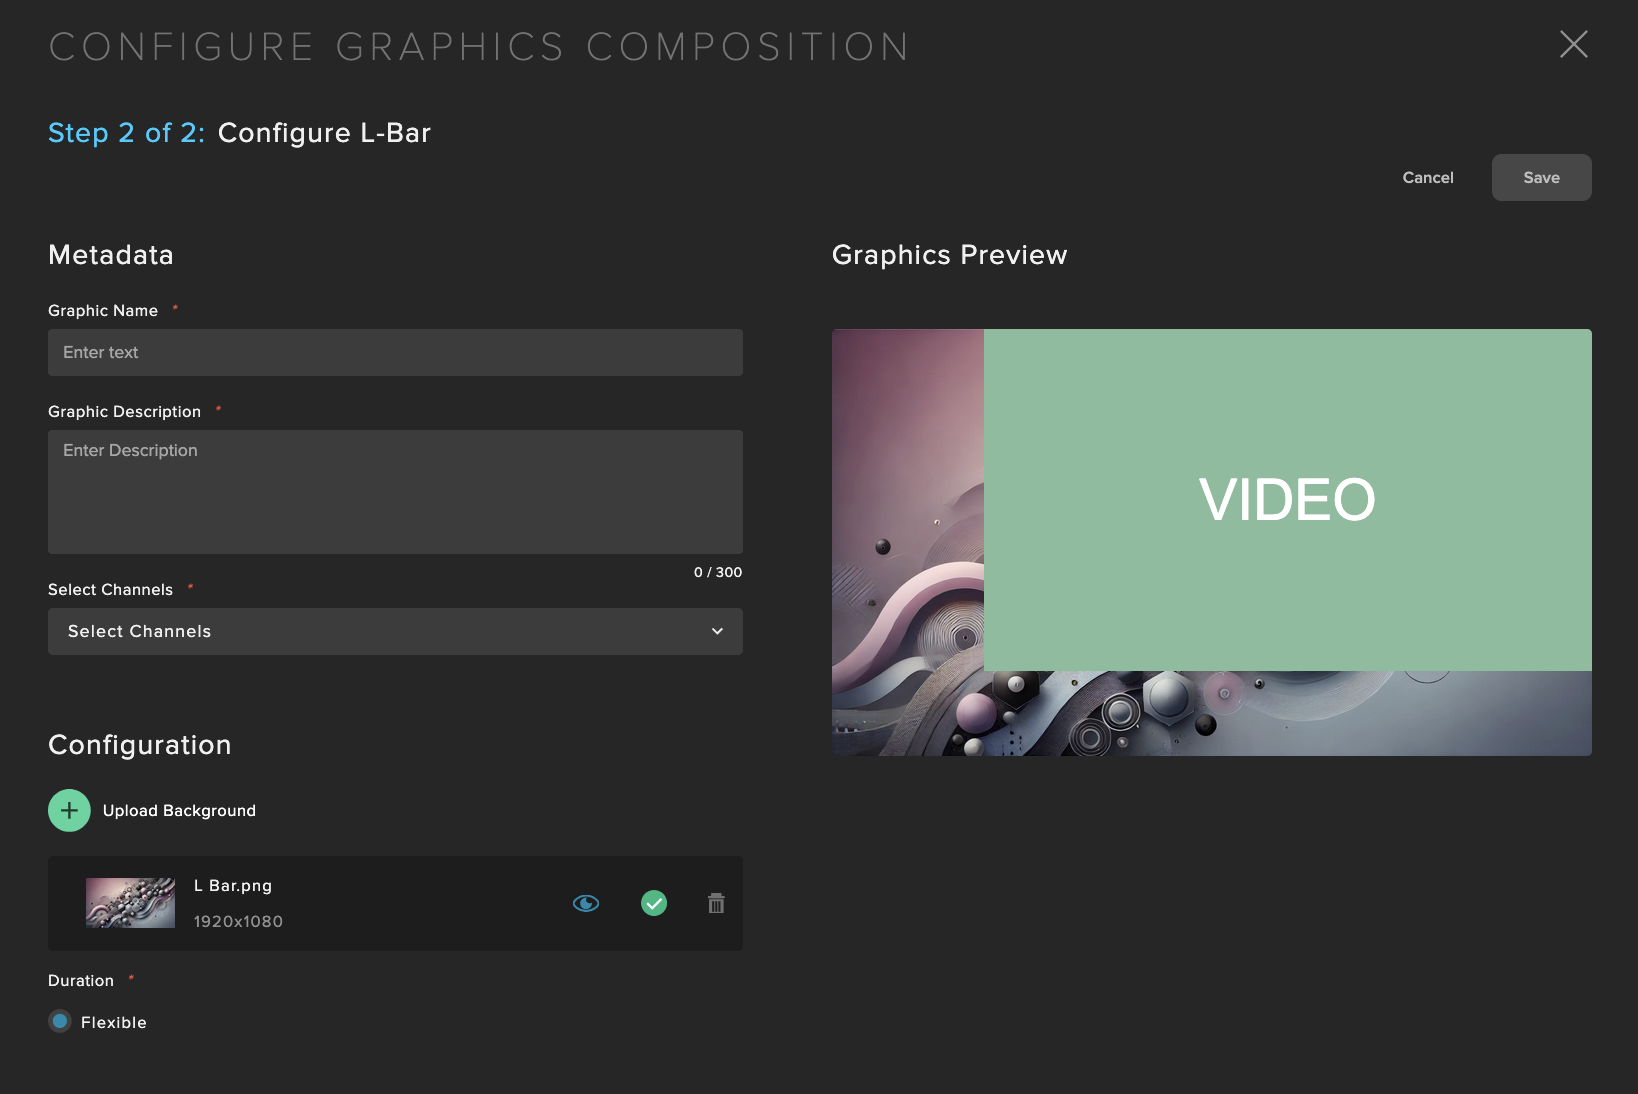
L-Bar
Scale and reposition video to create an L-shaped frame alongside the content for branded visuals.
Element | Size | Position |
|---|---|---|
Video | 1536 x 864 | (0,0) |
Background Image | Left Bar: 384px wide (Full Height)Bottom Bar: 216px high (Full Width) | (0,0) |
Fields that can be configured:
Graphic Name: Use a meaningful title that will allow easy identification of the graphic.
Graphic Description: Any additional details that may not fit into a title.
Select Channels: Select the linear channels that this graphic will be available to use in.
Upload Background: Select the background artwork. Supported file types are PNG and JPG.
Duration: Flexible means that when this Composition is used during Graphics scheduling, the scheduler can choose the final runtime duration.
J-Bar
Scale and reposition video to create a J-shaped frame for branded visuals along the right and bottom edges.

Element | Size | Position |
|---|---|---|
Video | 1536 x 864 | (384, 0) |
Background Image | Right Bar: 384px wide (Full Height)Bottom Bar: 216px high (Full Width) | (0,0) |
Fields that can be configured:
Graphic Name: Use a meaningful title that will allow easy identification of the graphic.
Graphic Description: Any additional details that may not fit into a title.
Select Channels: Select the linear channels that this graphic will be available to use in.
Upload Background: Select the background artwork. Supported file types are PNG and JPG.
Duration: Flexible means that when this Composition is used during Graphics scheduling, the scheduler can choose the final runtime duration.
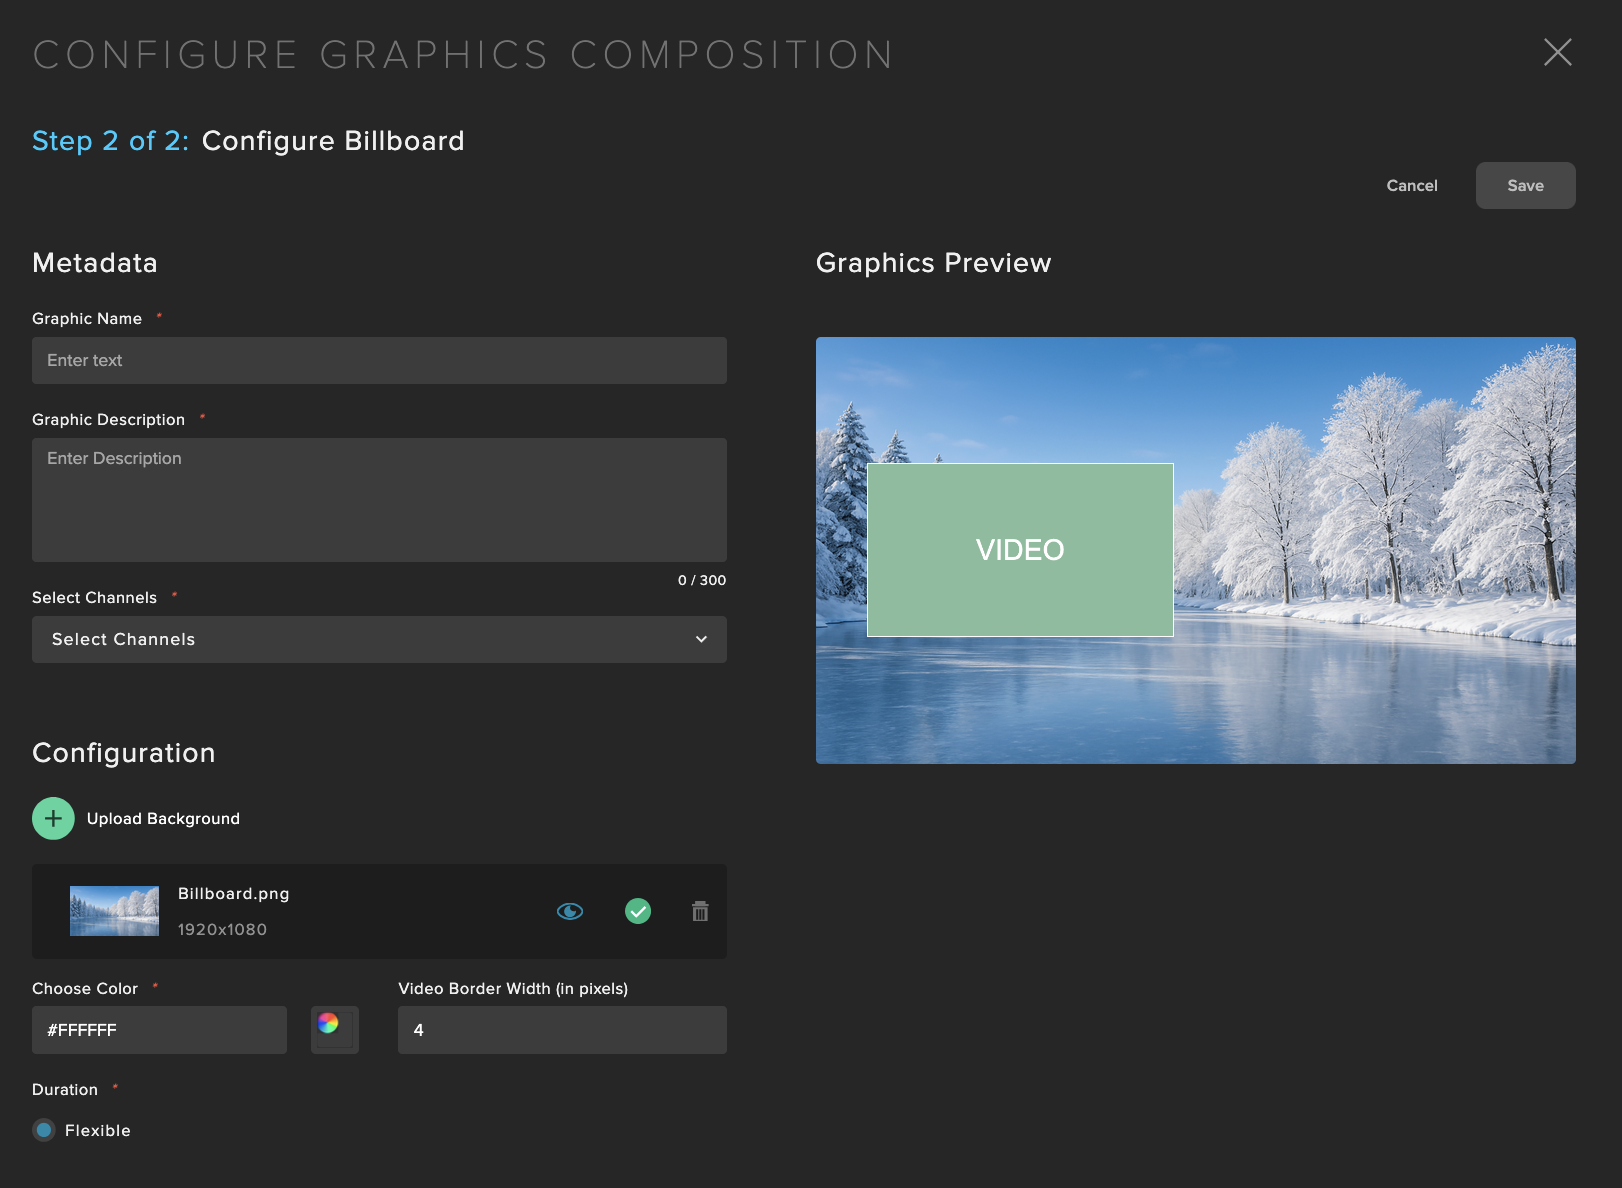
Billboard
Scale and reposition video to left center to create a large area on the right to support large graphics and branded storytelling.
Element | Size | Position |
|---|---|---|
Video | 768 x 432 | (230, 324) |
Background Image | 134 px from left, 902 px from right, 324 px from top/bottom | (0,0) |
Fields that can be configured:
Graphic Name: Use a meaningful title that will allow easy identification of the graphic.
Graphic Description: Any additional details that may not fit into a title.
Select Channels: Select the linear channels that this graphic will be available to use in.
Upload Background: Select the background artwork. Supported file types are PNG and JPG.
Configure Border: Define the border color and width that surrounds the video. You can type in the Hex code or use the visual color selector.
Duration: Flexible means that when this Composition is used during Graphics scheduling, the scheduler can choose the final runtime duration.
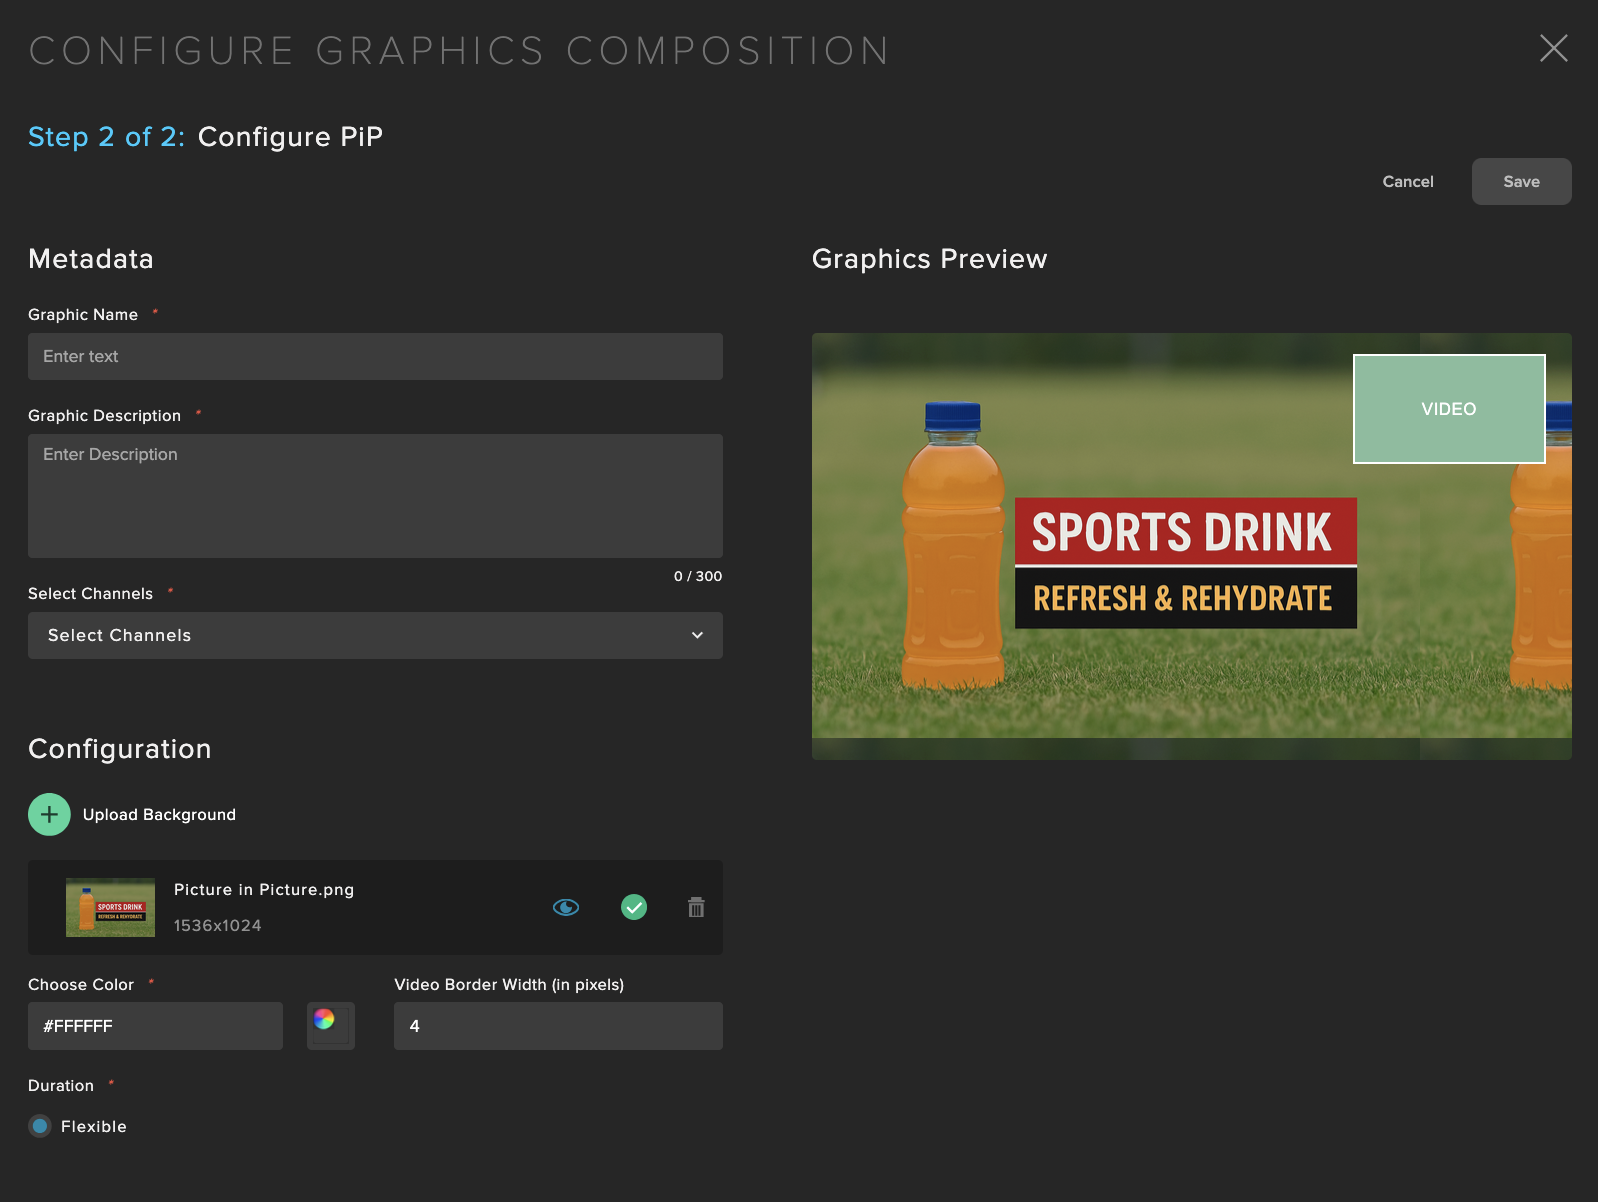
Picture-in-Picture
Scale and reposition video to top right to create a large area to support large graphics and channel information.
Element | Size | Position |
|---|---|---|
Video | 480 x 270 | (1152, 238) |
Background Image | Full Screen: 1920 x 1080 (Video sits on top) | (0,0) |
Fields that can be configured:
Graphic Name: Use a meaningful title that will allow easy identification of the graphic.
Graphic Description: Any additional details that may not fit into a title.
Select Channels: Select the linear channels that this graphic will be available to use in.
Upload Background: Select the background artwork. Supported file types are PNG and JPG.
Configure Border: Define the border color and width that surrounds the video. You can type in the Hex code or use the visual color selector.
Duration: Flexible means that when this Composition is used during Graphics scheduling, the scheduler can choose the final runtime duration.
Schedule Compositions to Channel or Programs
Graphics Compositions can be scheduled for playout using Channel Trigger Packages, which are a set of business rules, or individually added at individual Programs. To automate Graphics, it is recommended to use Channel Trigger Packages to schedule Graphics at scale instead of at individual Programs.
Channel Trigger Packages
In the Graphics tool is a tab for "Trigger Packages":
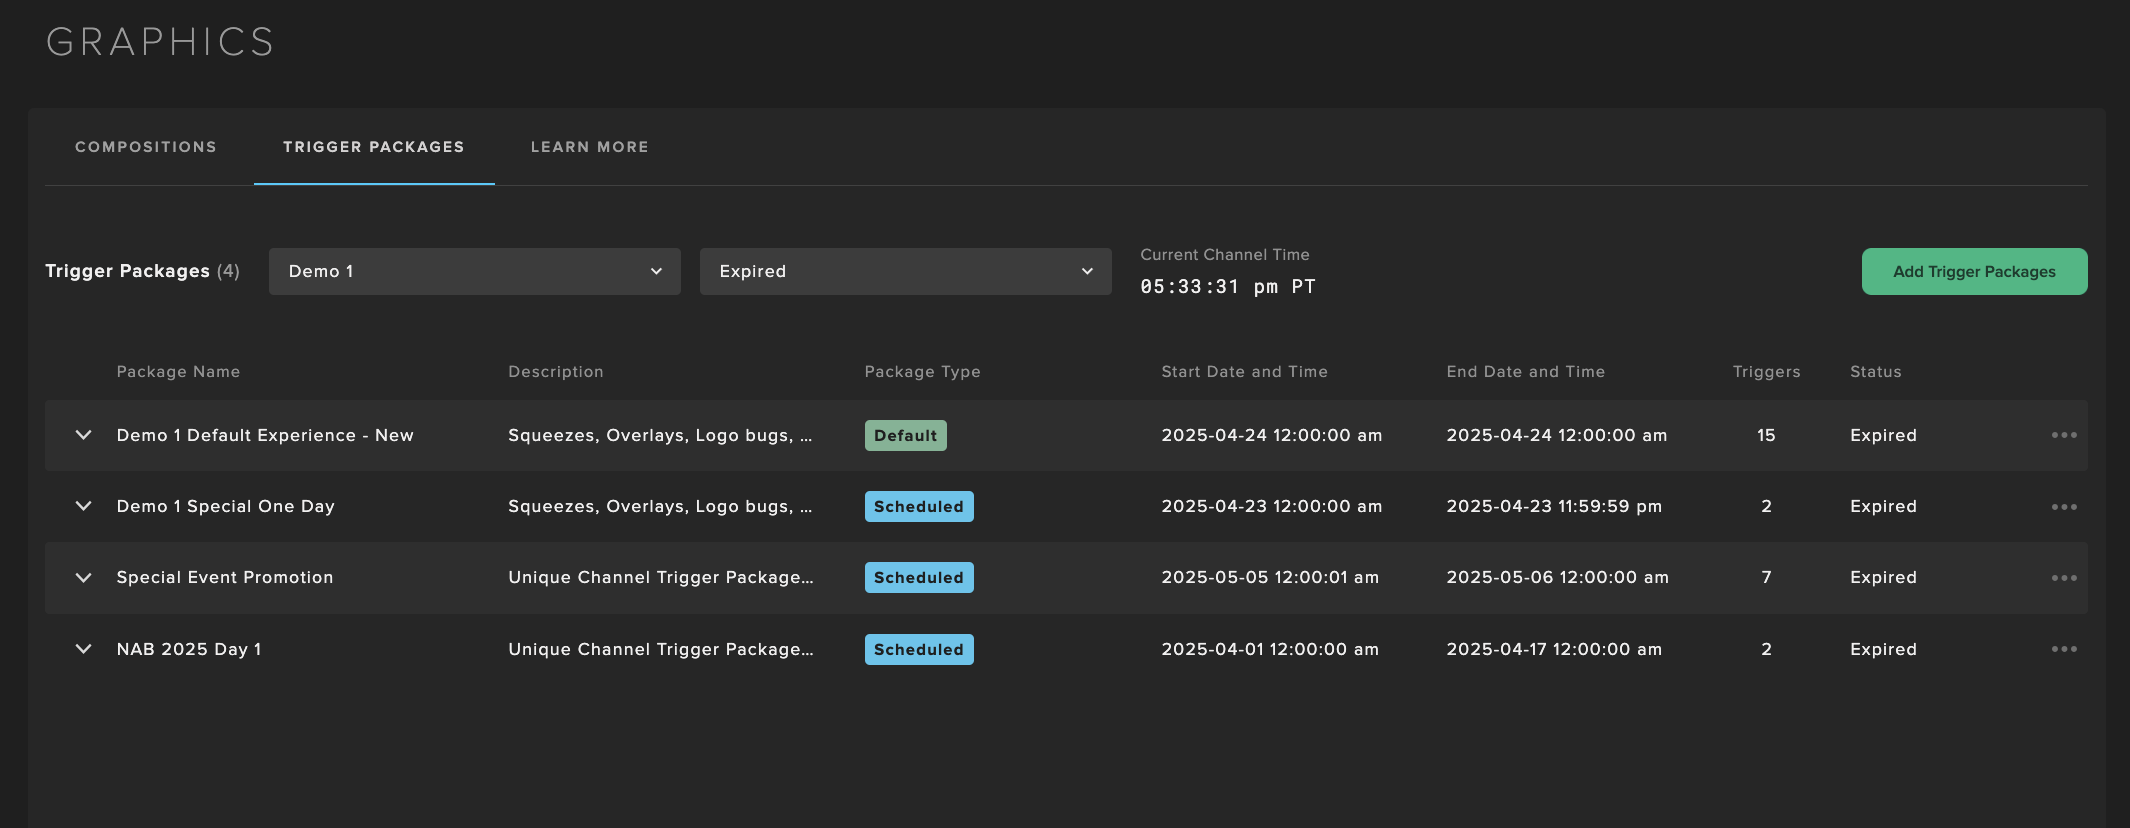
Select the channel to create a trigger package for, and "Add Trigger Packages":
Fill in the package details:
Package Name: Use a meaningful title that will allow easy identification of the graphic.
Description: Any additional details that may not fit into a title.
Package Type: Default means it will be used in perpetuity from the date selected unless a Scheduled Trigger Package supercedes it. Scheduled Trigger Packages will select a start and end date. The time is based on the selected channel’s local timezone.
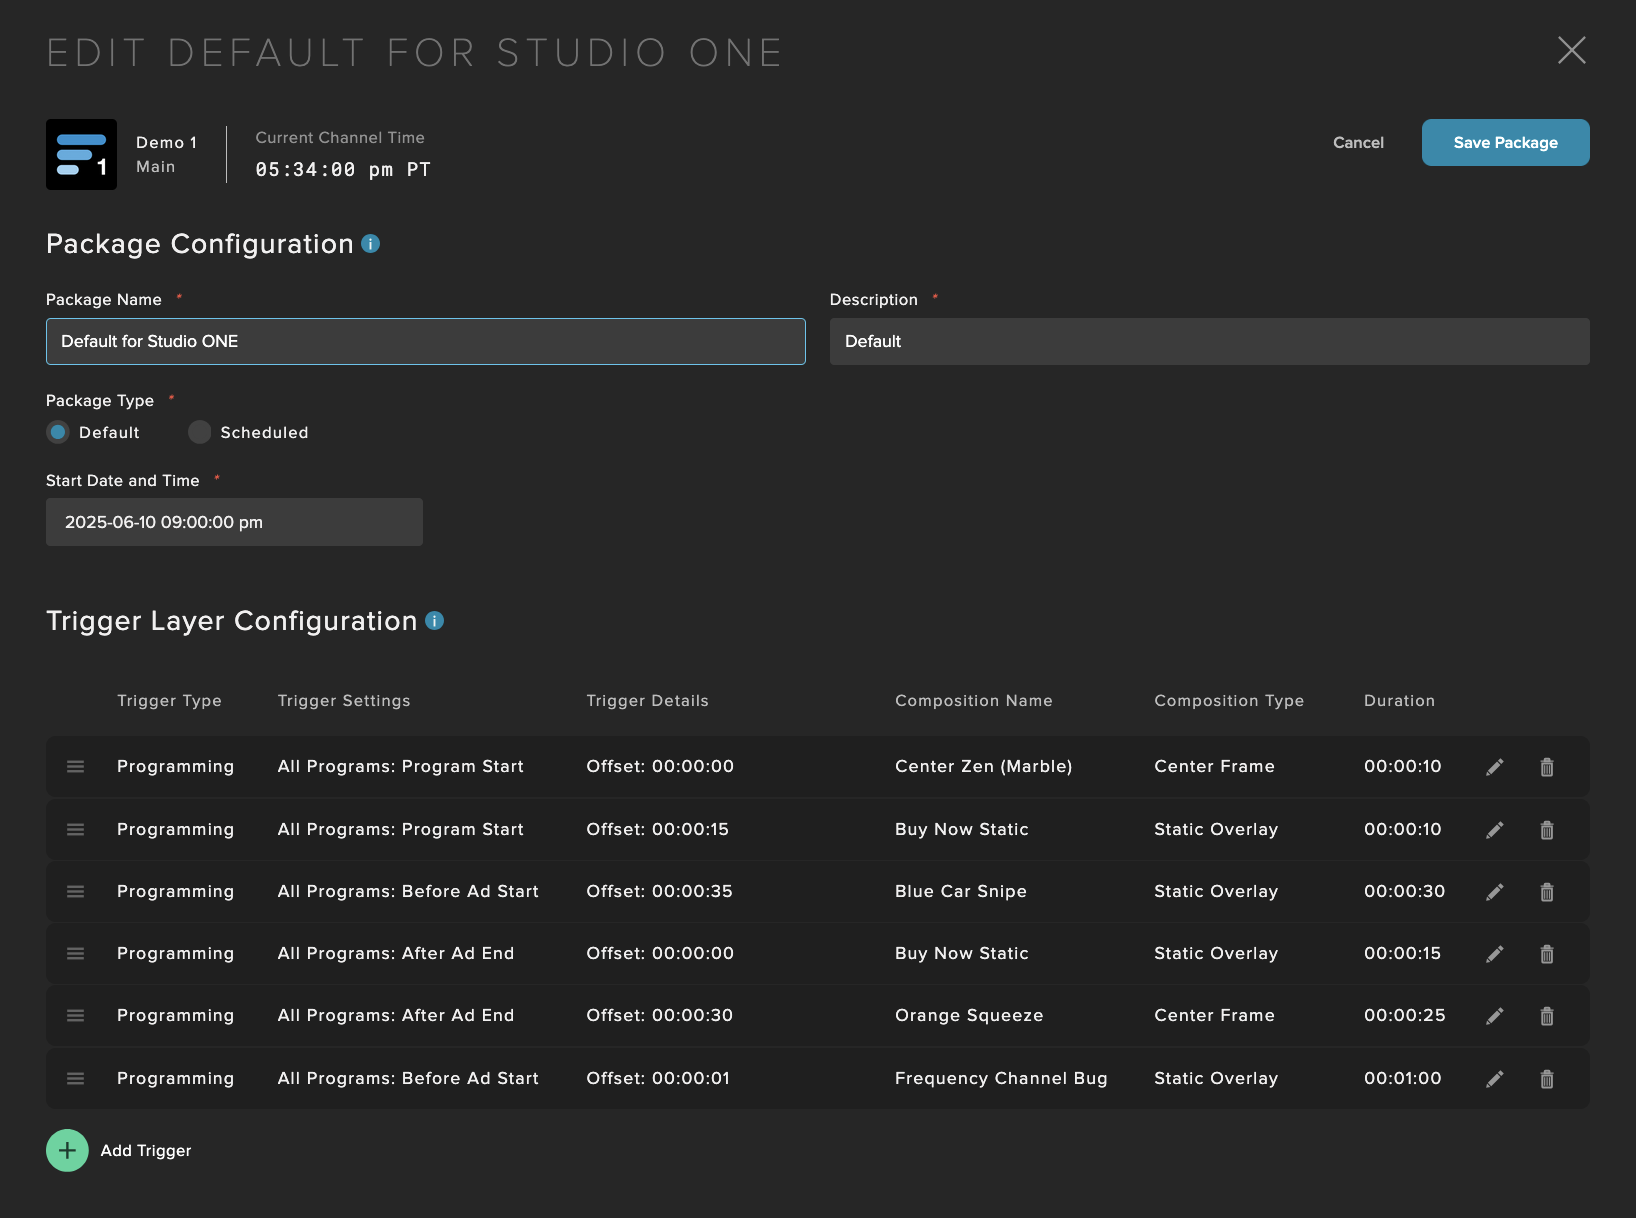
Add your triggers to the package:
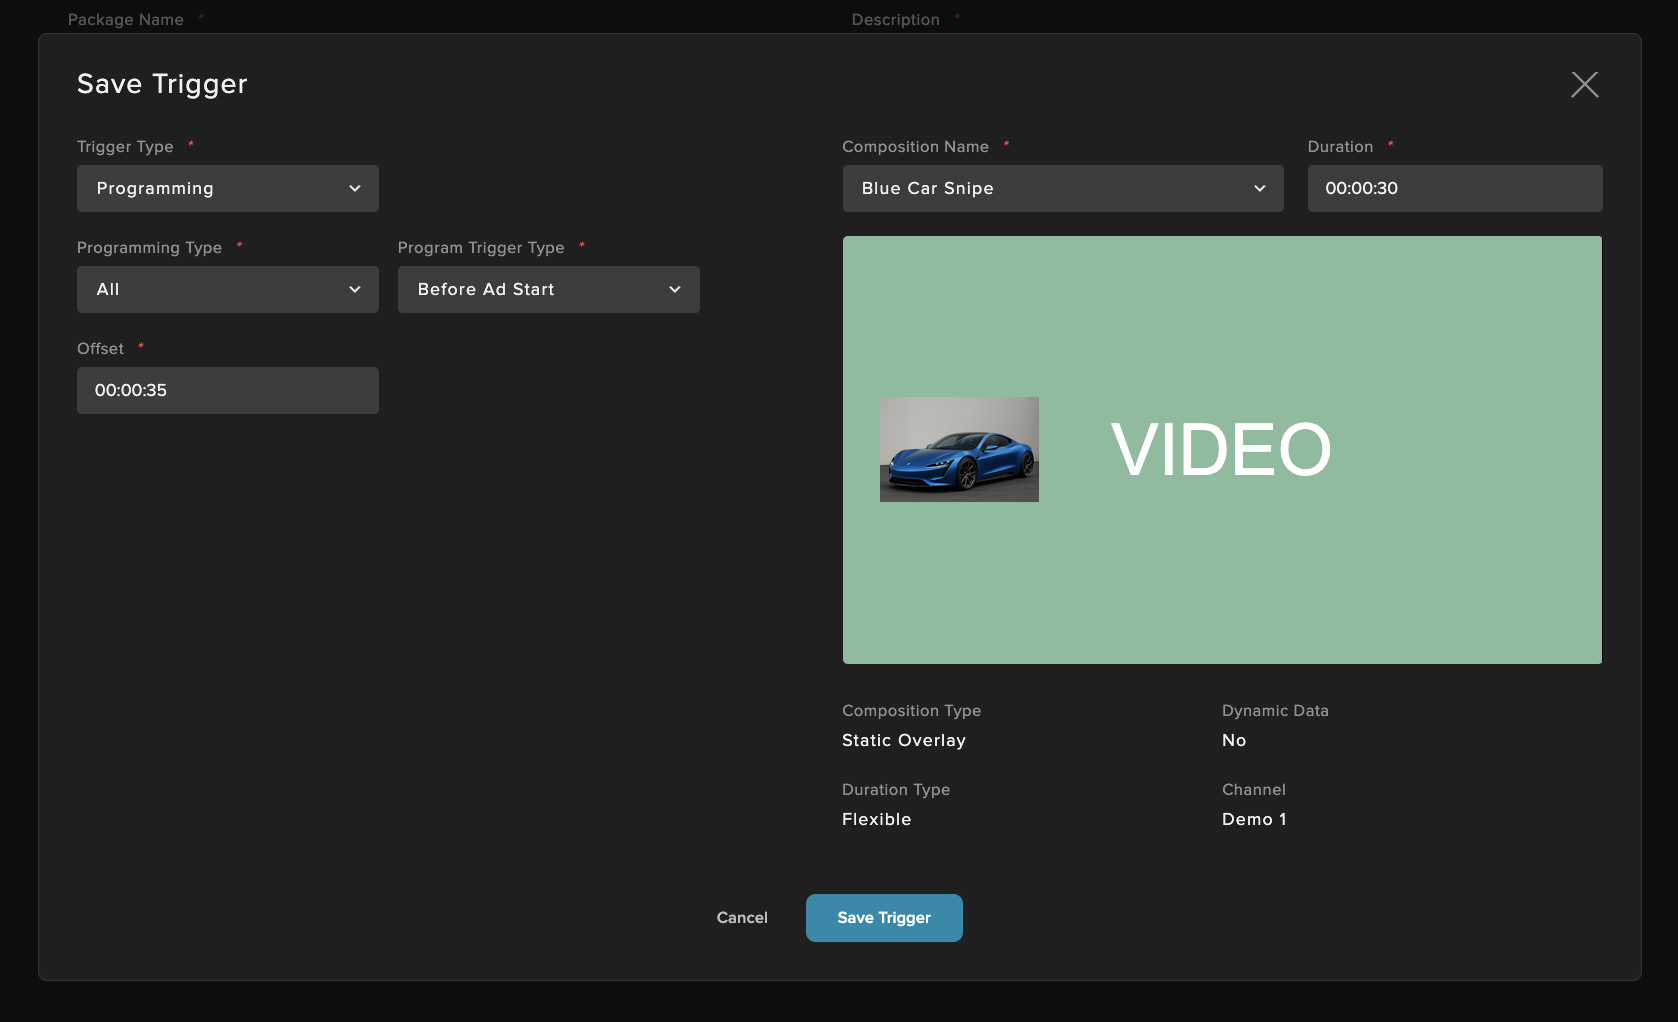
Fill in the following per trigger:
Trigger Type: Select between Programming or Time, Programming enables setting triggers at specific points in a program, whereas Time will run the composition at set intervals or days of the week.
Programming:
Note
Live only triggers during Automatic Live events, not Manual Live events.
Programming Type: Select between All, VOD program, Playlist, or Live event. The trigger will run during that program type.
Program Trigger Type: Select between the following triggers:
Program Start
Program End
Before Ad Start
After Ad End
Segment Start
Offset: The time offset that the trigger will play.
Time Interval Type: Select between Minute, Hour, Day Week, or one time. There will be relevant fields to input the time settings per type.
Composition Name: The composition to be used for this trigger.
Duration: How long the trigger will run for, if not already selected.
Individual Program-specific Graphics
Compositions can be set at the program level as well, to run content specific programs. To do so, create a program in the video details page, found in the Programs tab:
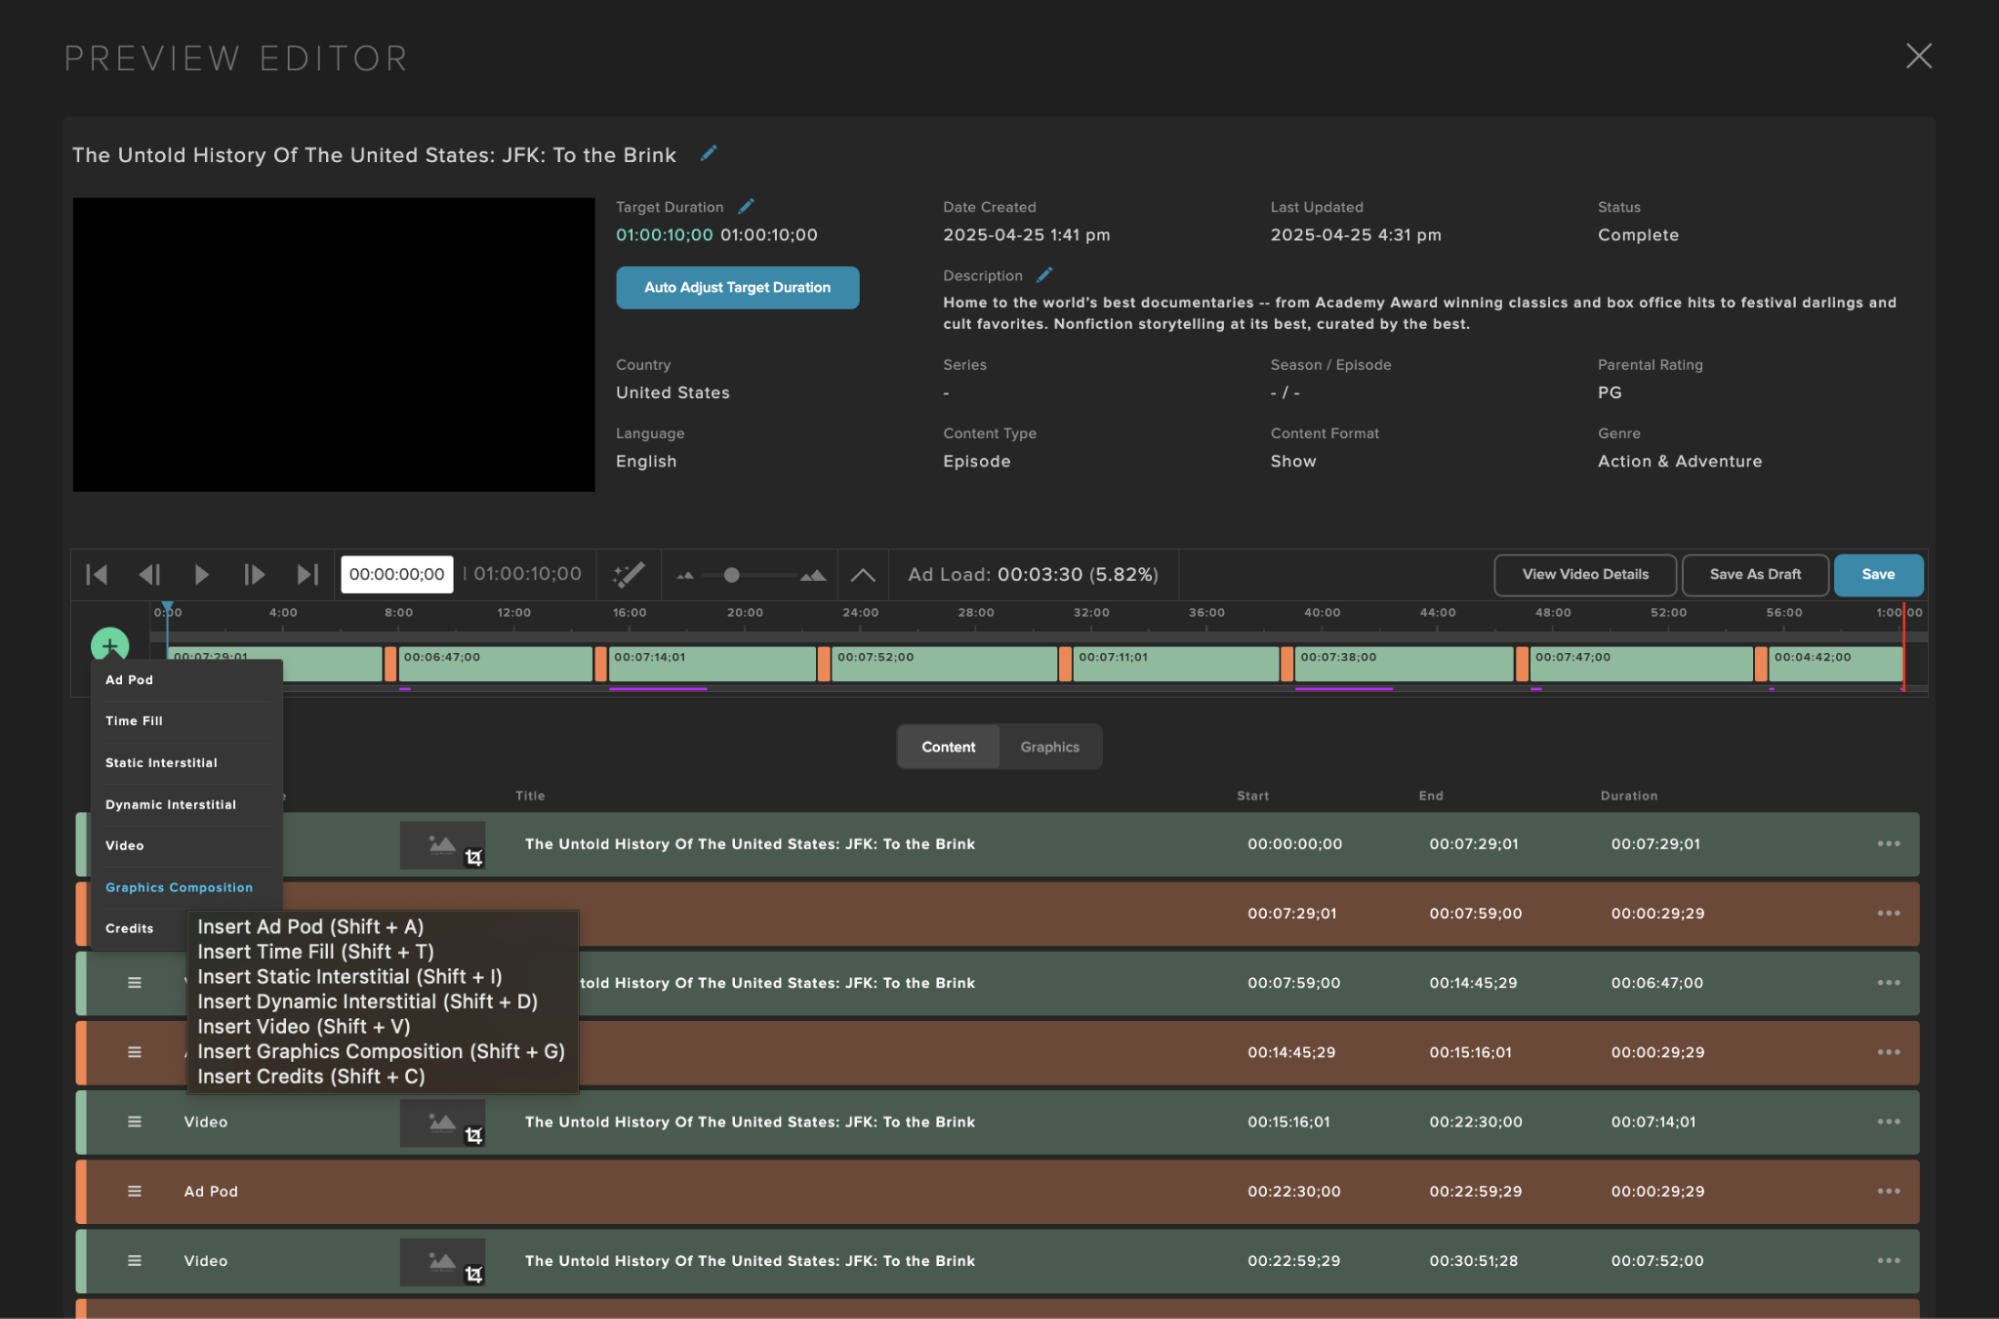
Add the graphics composition or credits over the segments for it to be played, it will display as a purple line underneath. To edit or remove graphics in a program, select the graphics tab in the center of the screen:
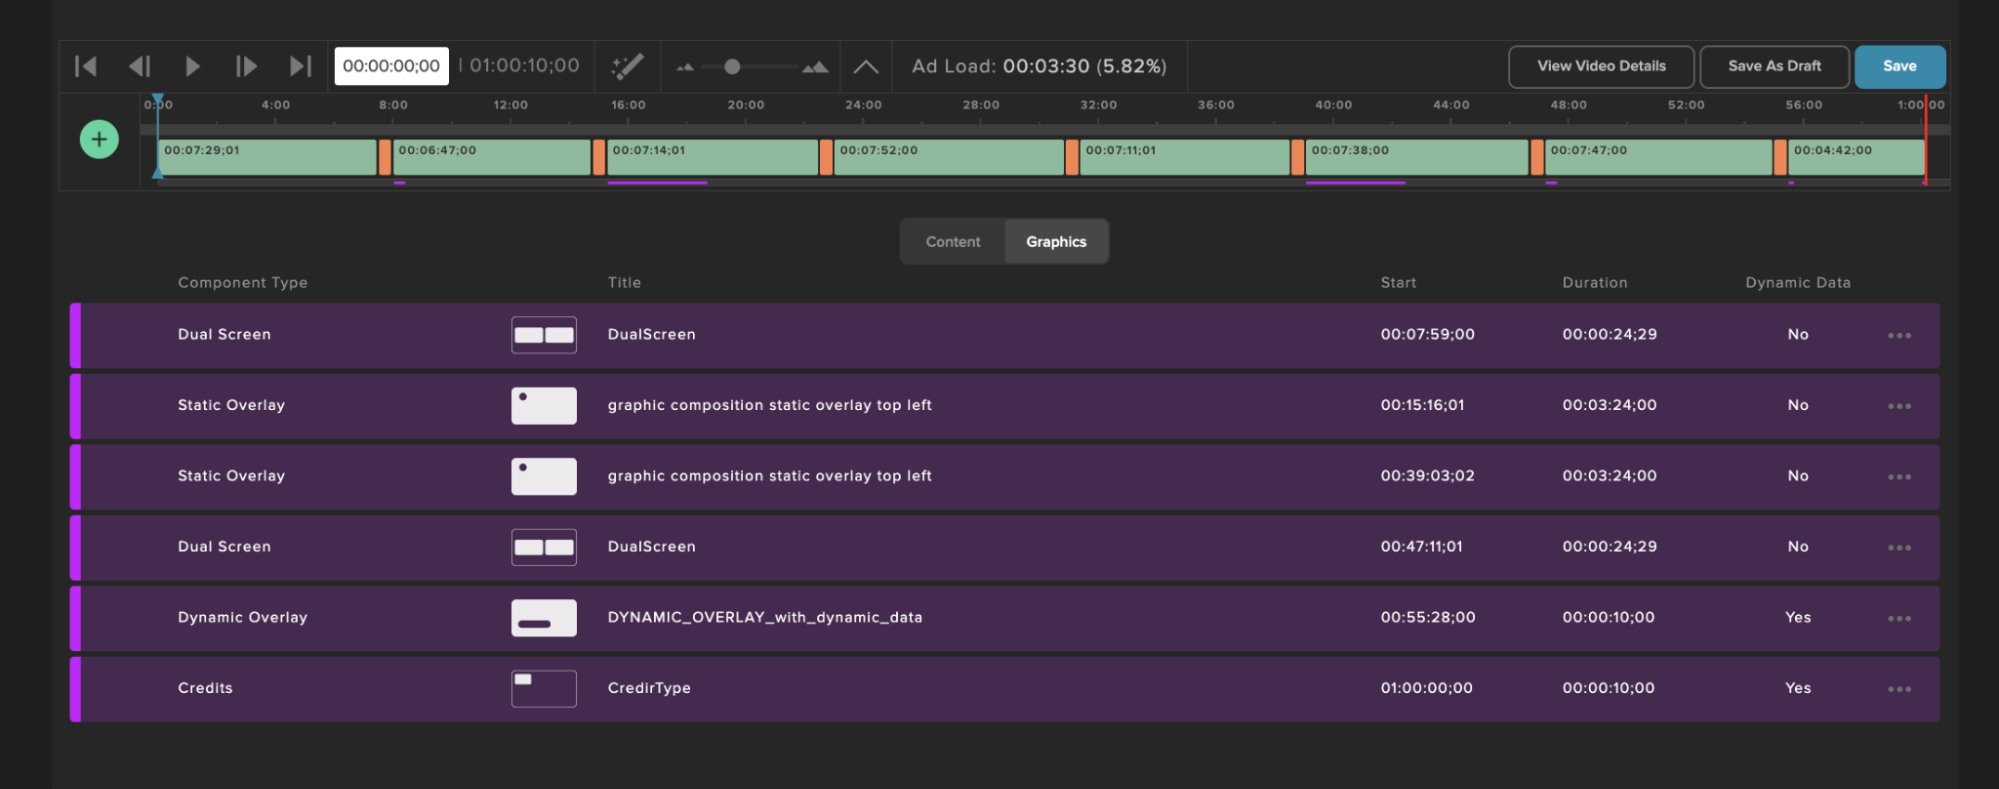
Click the three dots at the right of each graphic and Remove or Edit.
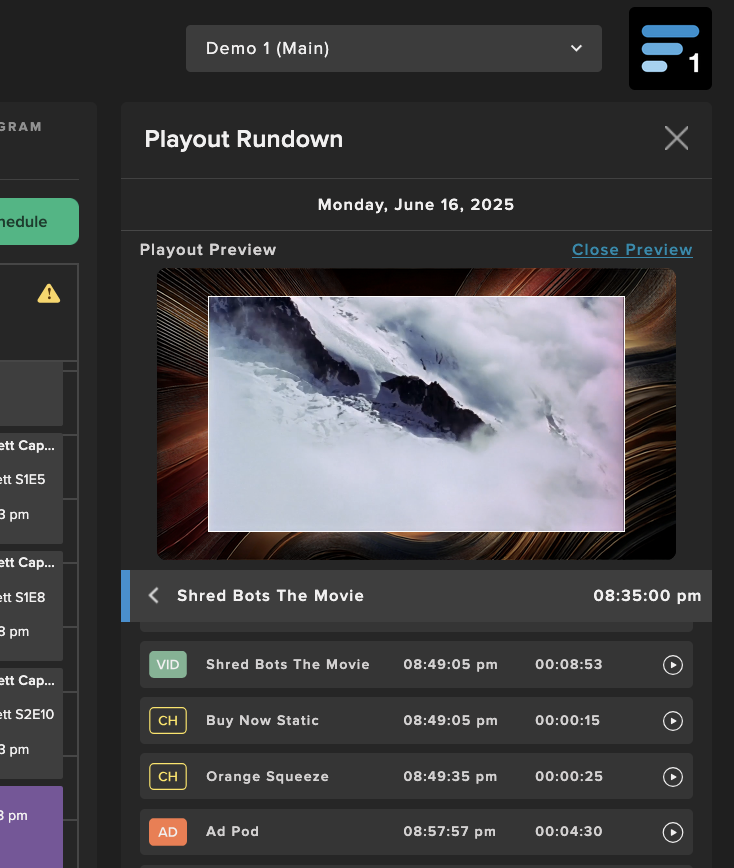
Preview & Validate Graphics
Use the Schedule Rundown to preview the scheduled Graphics components prepared for playout. This can preview supports:
Showing all graphics triggers from Channel Trigger Package and Program-specific triggers
Concurrent graphics experiences
Dynamic metadata for the Program having Graphics
Frame-accurate matching against the video content
Previews the final playout in advance and from the past
Once assets have been added to the Schedule, they can be previewed by selecting the magnifying glass button at the right of the schedule:

There each program segment can be selected, and will display the graphics compositions used for it:
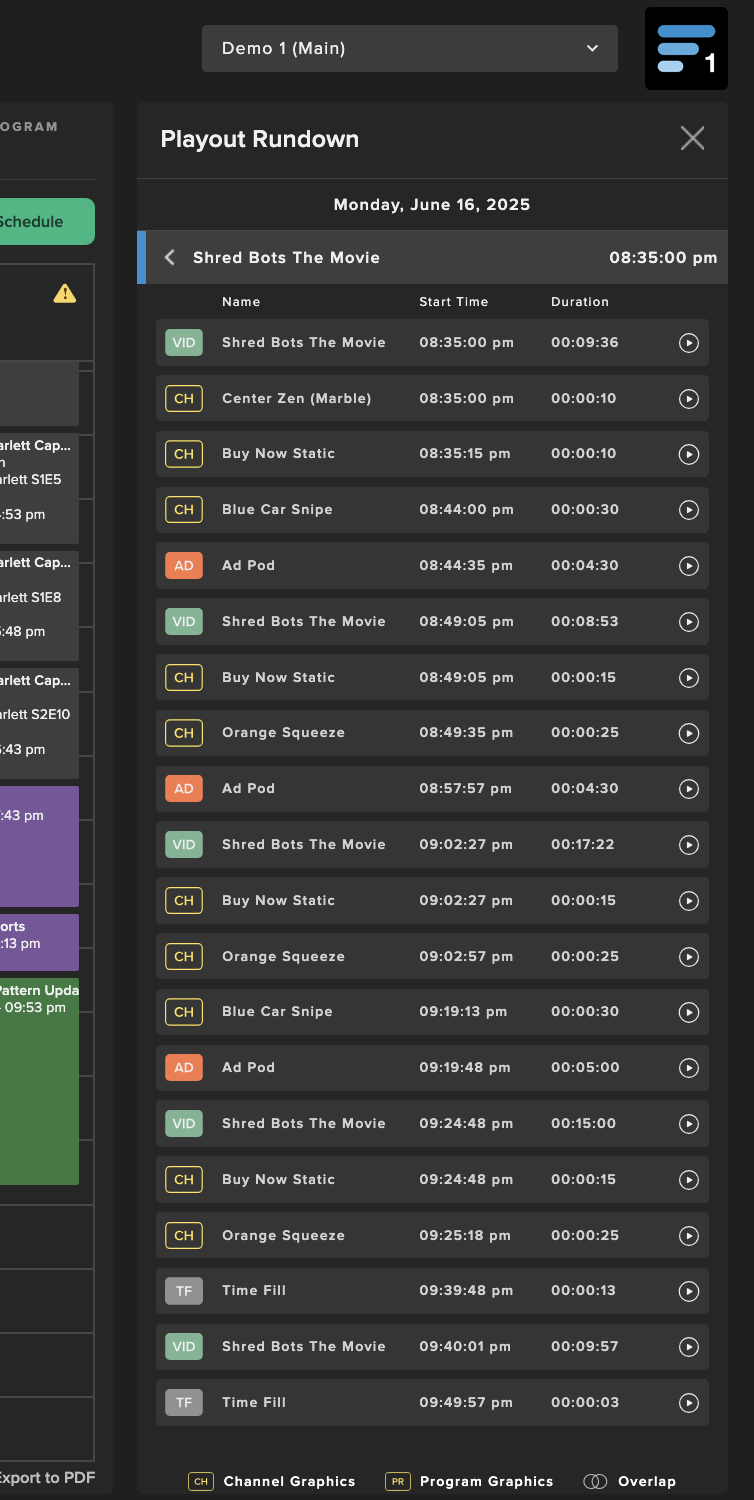
To preview a specific Graphics component, click on the Play button next to the component. A preview player will open at the top and show the final playout experience (video + graphics + dynamic metadata). It can be for the past or the future.
Best Practices
Follow these workflow best practices to ensure your graphics look great, perform reliably, and are easy to manage in Frequency Studio. Additional specific Best Practices can be reviewed here.
Use the Right Format for Each Type of Graphic
Static Overlays (PNG): Ideal for channel logos, bugs, QR codes or banners. Keep resolution at 1920x1080 (minimum 100x100). Simple and fast to deploy.
Tip
When using QR codes, use a URL wrapper to ensure traffic driven by the link is trackable.
Dynamic Overlays (Lottie JSON): Best for metadata-driven motion graphics (e.g., program titles, now/next/later, ratings). Export from Adobe After Effects using the Bodymovin plugin. Use vector shapes, and keep animations lightweight.
Motion Video (WebM): Great for short looping effects that don’t need text updates. Use when you want animation but not interactivity.
Advanced Layouts (Squeezebacks, L-bars, PiP): Use Enhanced Graphics features to reposition the main video and layer on PNG, WebM, or Lottie assets for multi-zone layouts (e.g., credits squeeze, side-by-side playback, sponsorship zones). Click here for Squeezeback background reference dimensions.
Author Smart in After Effects
Refer to the AfterEffects Authoring Compatibility for Lottie Guidelines
DO:
Use shape layers and basic transforms (position, scale, rotation, opacity).
Export live text (not glyphs) if it should be dynamically updated in Studio.
Include custom fonts as web-safe or upload them with the JSON.
Use the LottieFiles plugin with the “Feature Support” checker before exporting.
DON'T:
Avoid blending modes, 3D layers, glows, blurs, or third-party plugins like Trapcode—they won’t render.
Don’t embed video content (.mp4, .mov) in your animation—Lottie doesn’t support it.
Design for Performance and Reliability
Keep compositions lightweight:
Merge redundant shape layers.
Trim unused keyframes and hidden layers before export.
Prefer short animation loops (~3–5 seconds) over long sequences.
Export sidecar files separate from Lottie. Compress all files into a ZIP file to upload complex sidecar files (subfolders are supported this with this method)
Test everything:
Use Studio’s real-time preview to verify appearance, timing, and animation behavior before scheduling.
Automate with Metadata and Triggers
Link graphics to program metadata (e.g., title, parental rating) for real-time updates without manual edits.
Set up rule-based triggers (e.g., Program Start, Ad End) in Trigger Packages for fully automated scheduling.
Use channel-level triggers for consistent branding, and program-level triggers for content-specific overlays.
Schedule in advance future channel Trigger Packages to transition into and out of graphics experiences automatically.
Plan for Localization and Reuse
Use dynamic fields for region-specific text, titles, or data.
Design templates with flexible layouts that handle variable text lengths or local branding.
Avoid hardcoded text unless it's static across all regions.
Monitor, Validate, and Iterate
Use Studio’s Schedule Rundown to preview how graphics will appear in real playout.
Monitor playout logs and alerts to catch rendering or timing issues early.
Periodically review performance and viewer engagement to refine graphic placement and creative strategies.