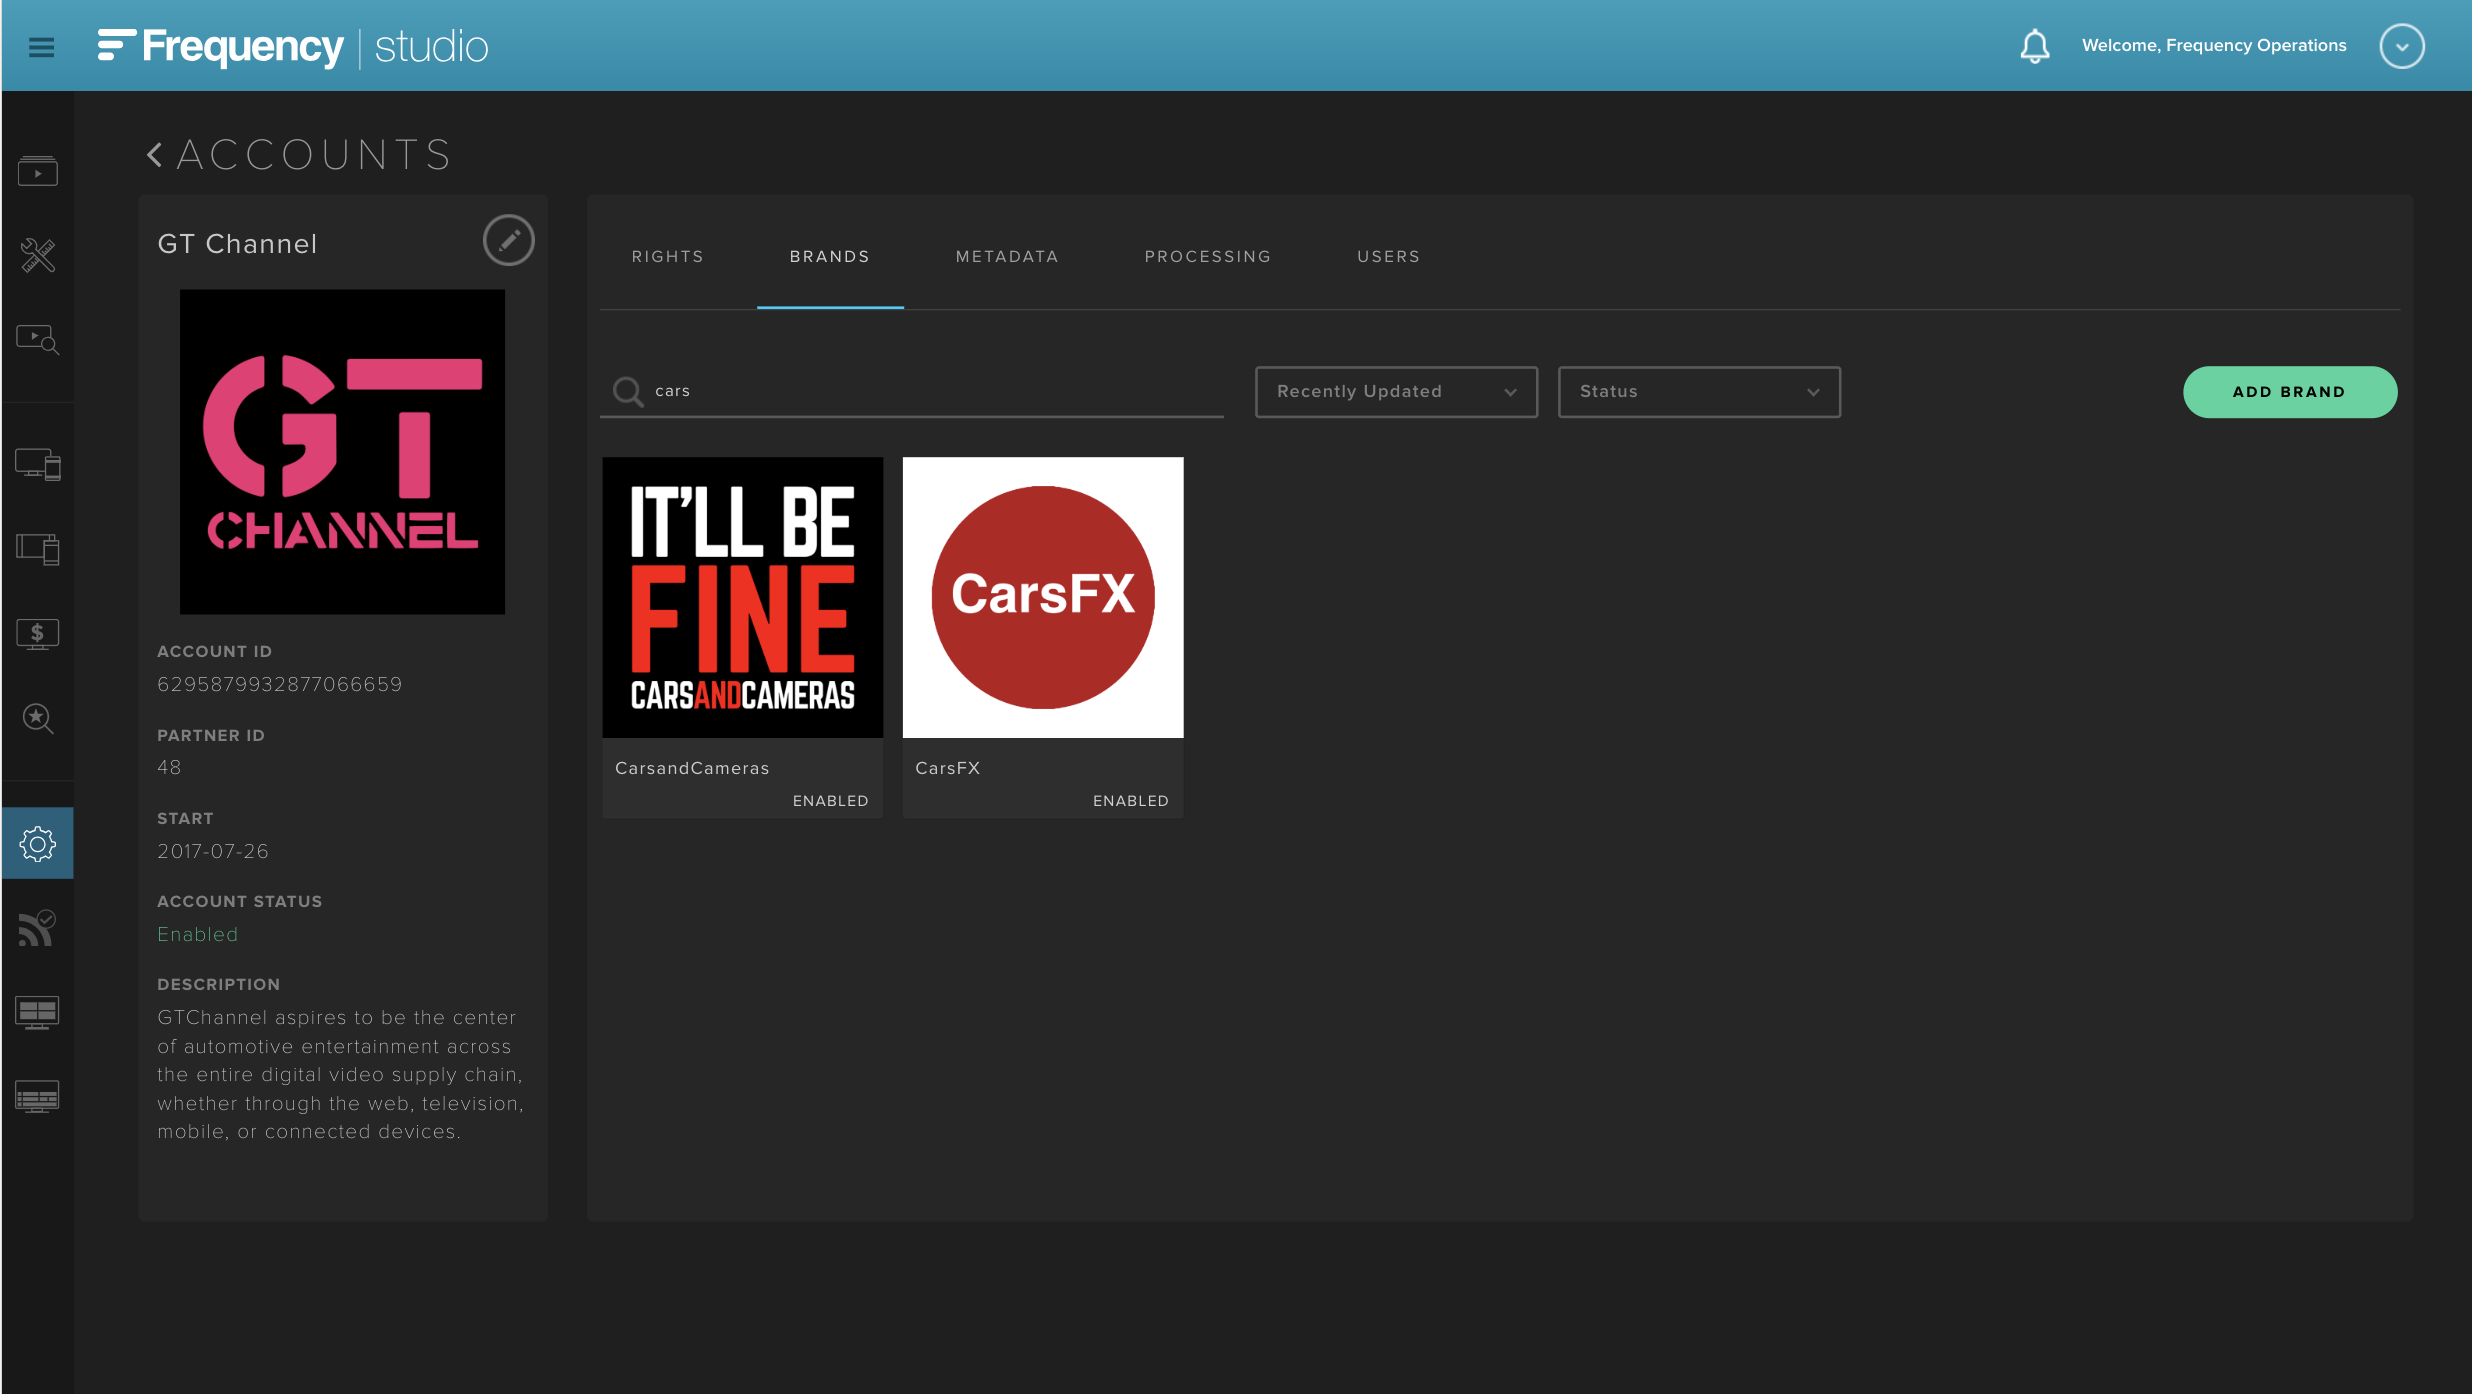
Brand Management
Brands represent defined constructs of where associated content is attributed as branded packages. If you have multiple distinct properties you want to upload content to, this is one way they can be organized. These brands will show up as places to upload and manage content (See MANAGE user guide).
The user can also filter by the title of the Brand, status, and sort by date when managing an account with a larger number of brands.
 |
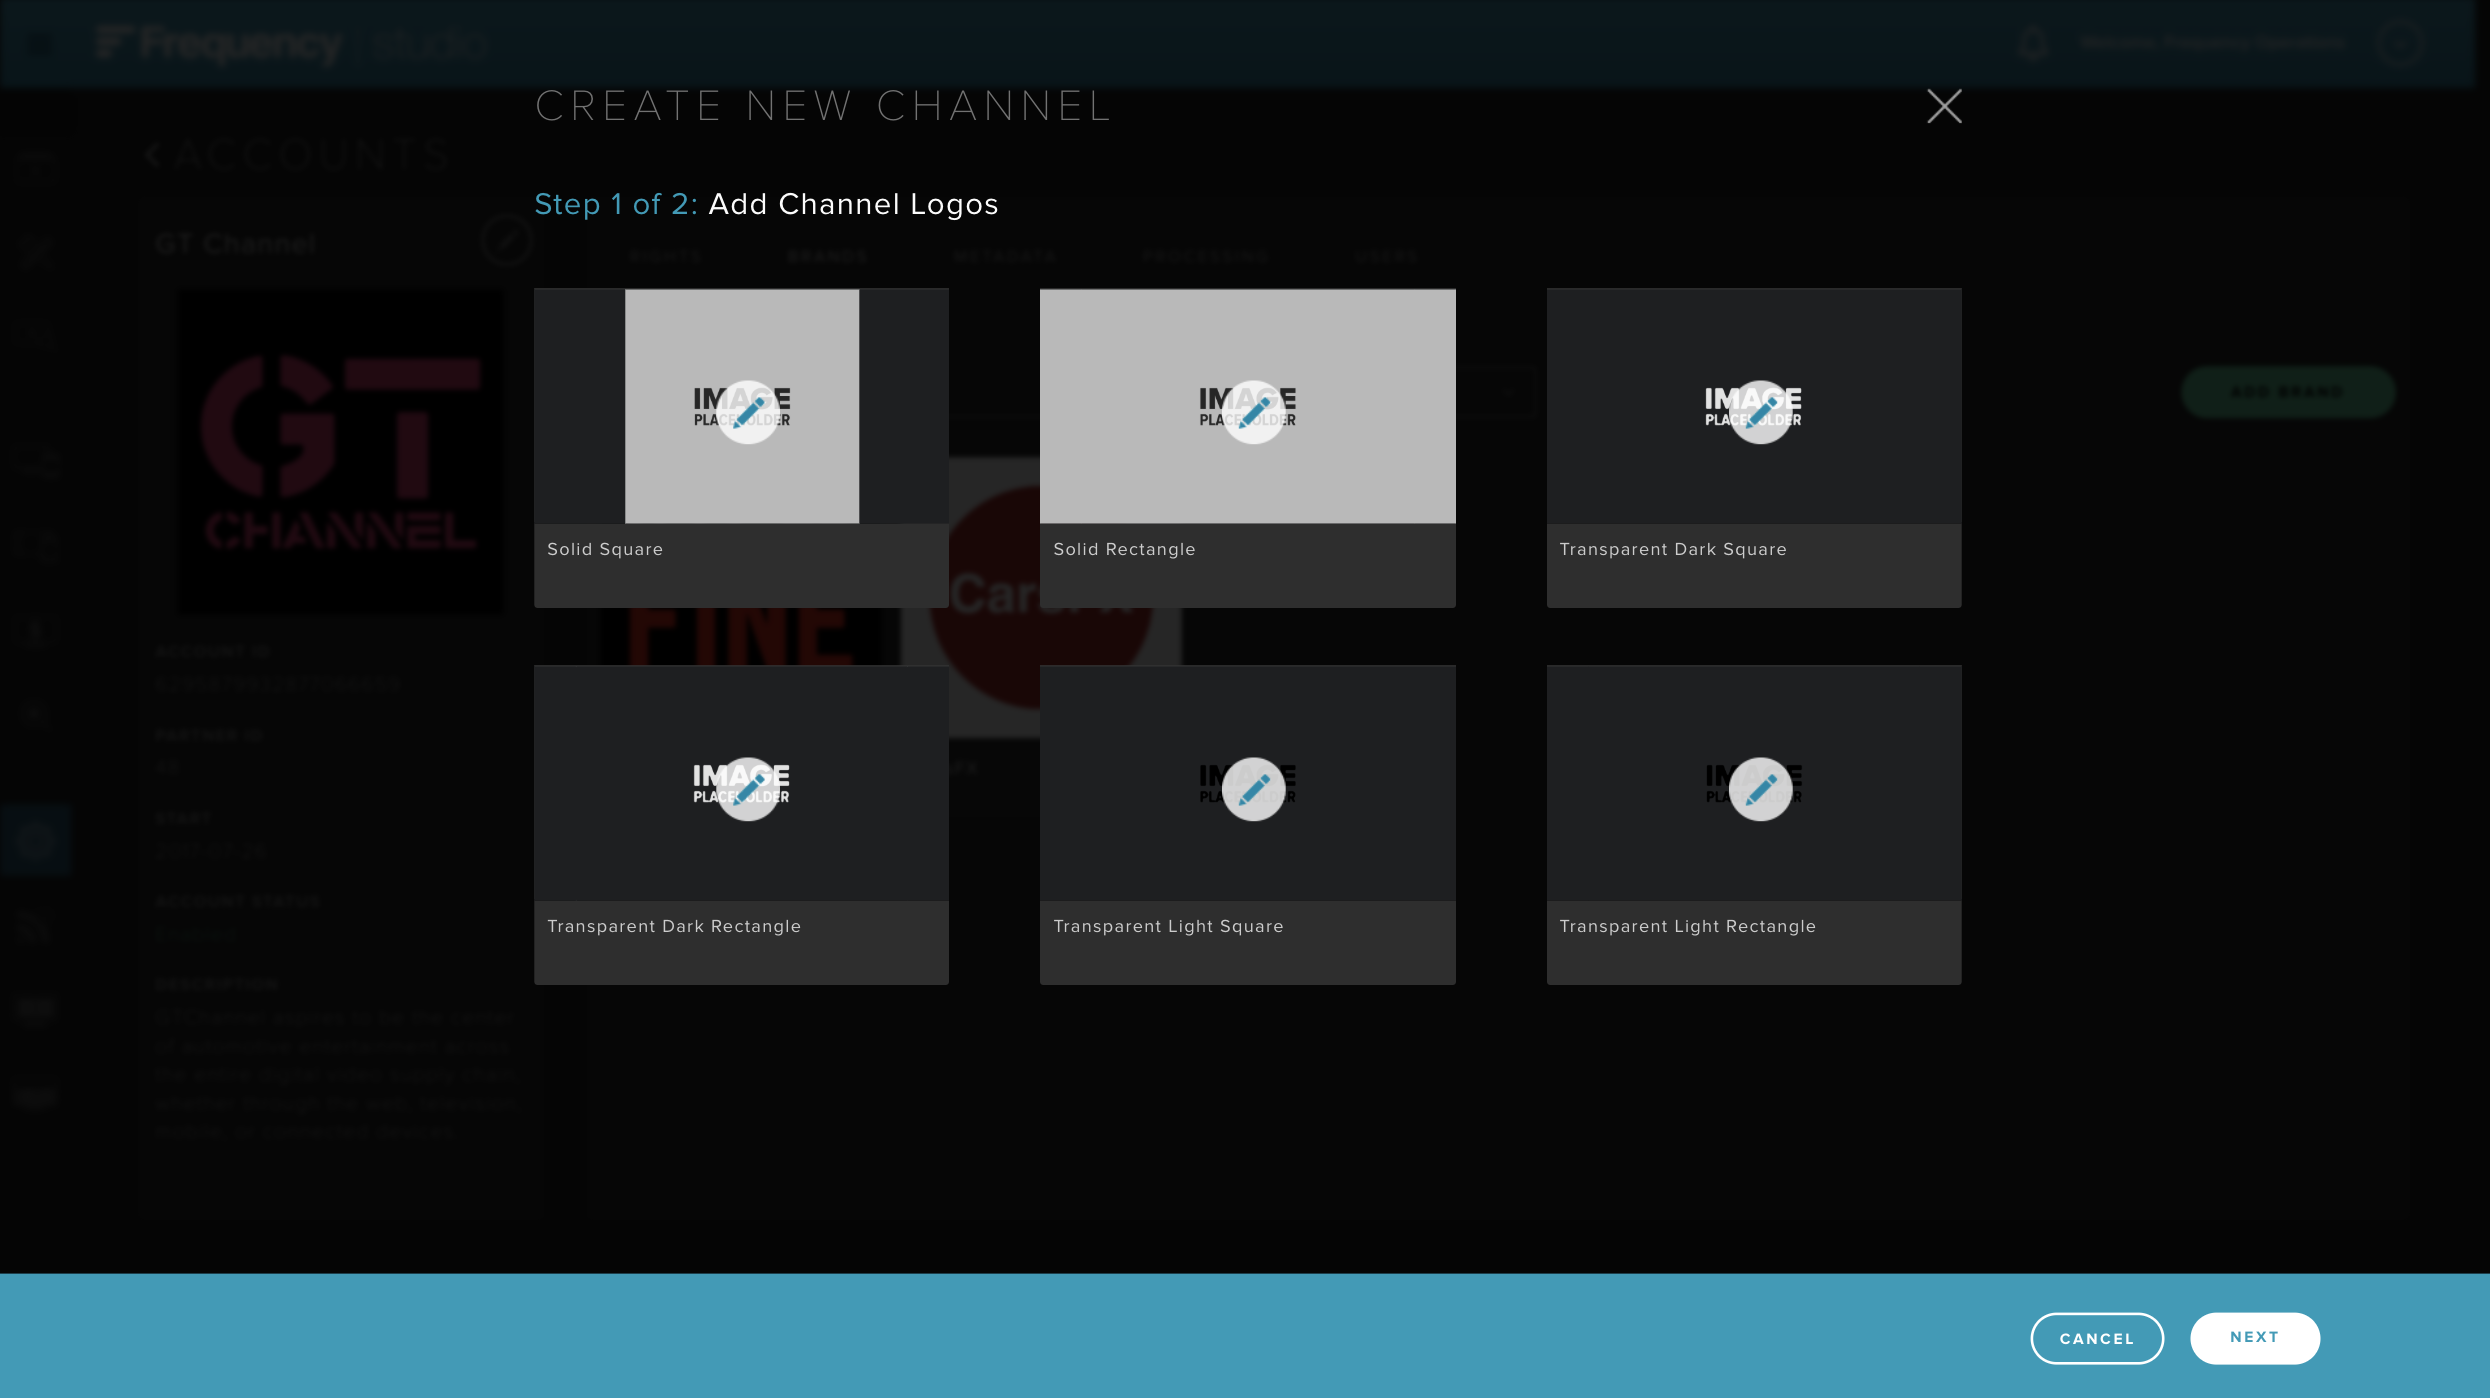
Create New Brand
Step 1 of 2: Add Brand Logos
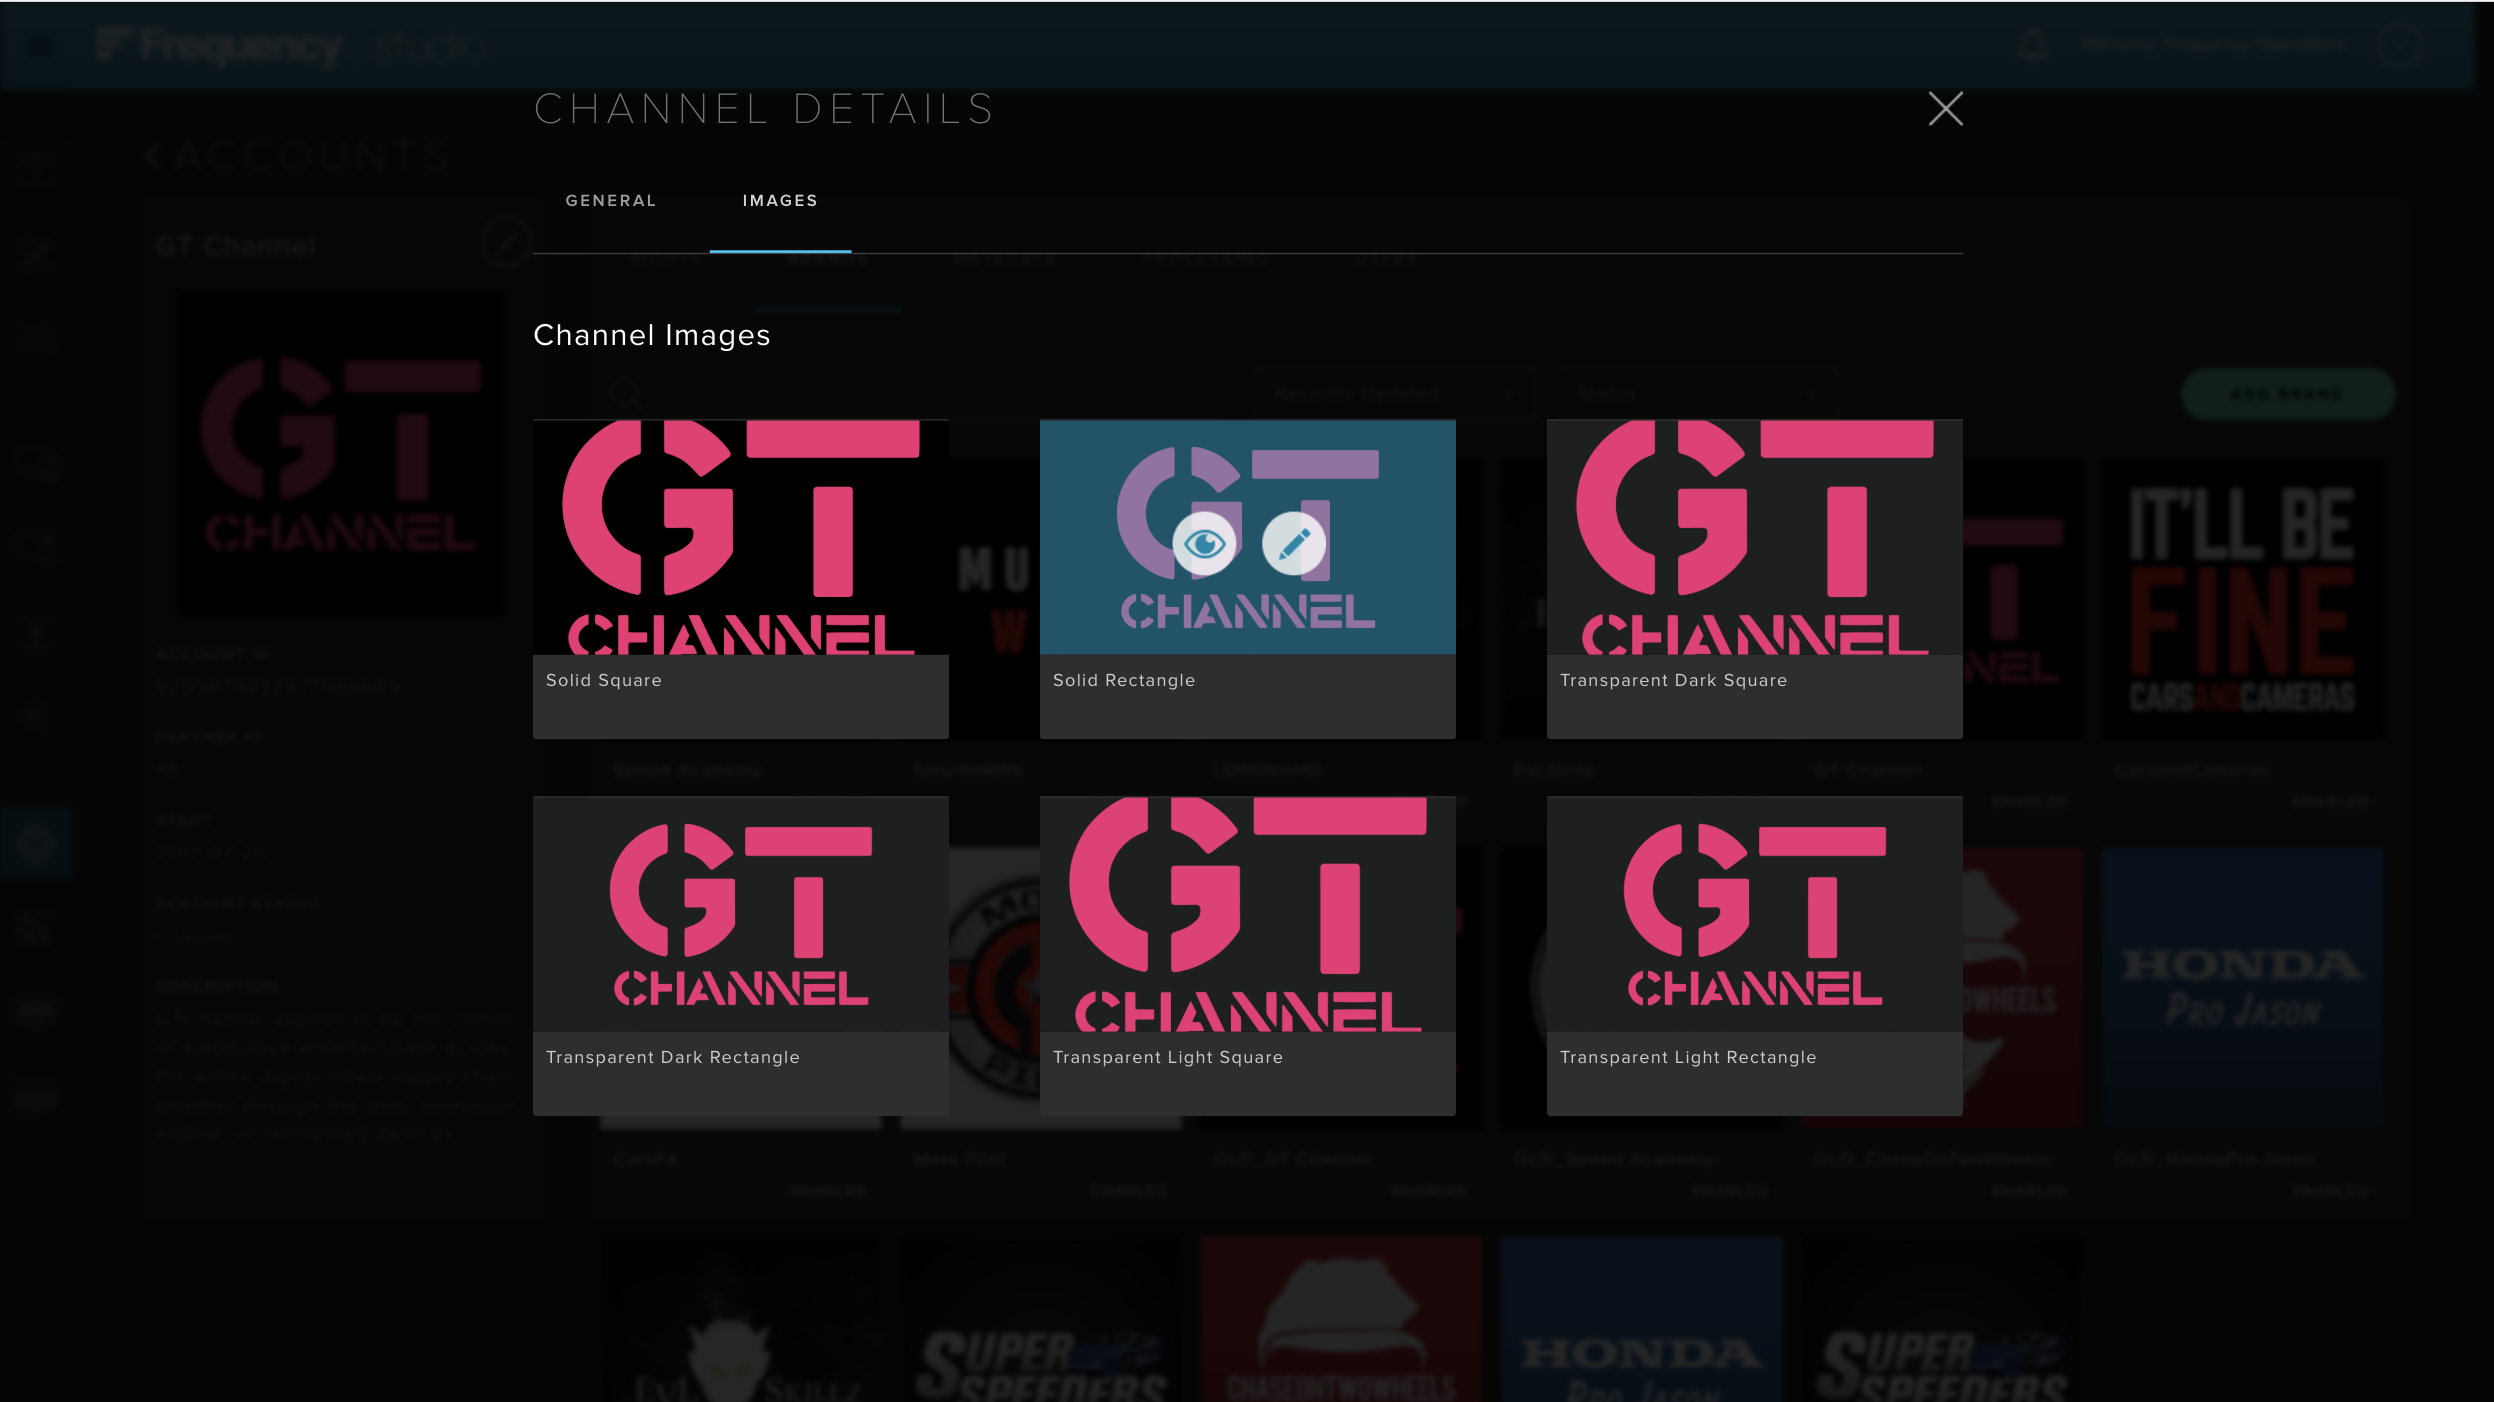
You can create a new brand by using the ADD BRAND button. Select and upload the 6 required image type and shapes by our system. This is to ensure distribution compatibility as these would cover a wide variety of display implementation in consumer-facing applications.
Square images require a minimum resolution of 720x720 pixels and must have a 1:1 aspect ratio. Rectangular images require a minimum of 720 pixels and can have any aspect ratio other than 1:1
Asset definitions/style guidelines:
Solid Square: For use in any application where brands are clearly displayed. JPG/PNG. Filled in background, imagery should be both wide and tall so it is easily visible.
Solid Rectangle: For use in any application where brands are clearly displayed. JPG/PNG. Preferred 16:9. Filled in background, imagery should be formatted to fill out width well.
Transparent Dark Square: Use light text/imagery. This image will be displayed on applications with dark backgrounds. Transparent PNG. Imagery should be both wide and tall so it is easily visible.
Transparent Dark Rectangle: Use light text/imagery. This image will be displayed on applications with dark backgrounds. Transparent PNG. Imagery should be formatted to fill out width well.
Transparent Light Square: Use dark text/imagery. This image will be displayed on applications with light backgrounds. Transparent PNG. Imagery should be both wide and tall so it is easily visible.
Transparent Light Rectangle: Use dark text/imagery. This image will be displayed on applications with light backgrounds. Transparent PNG. Imagery should be formatted to fill out width well.
 |
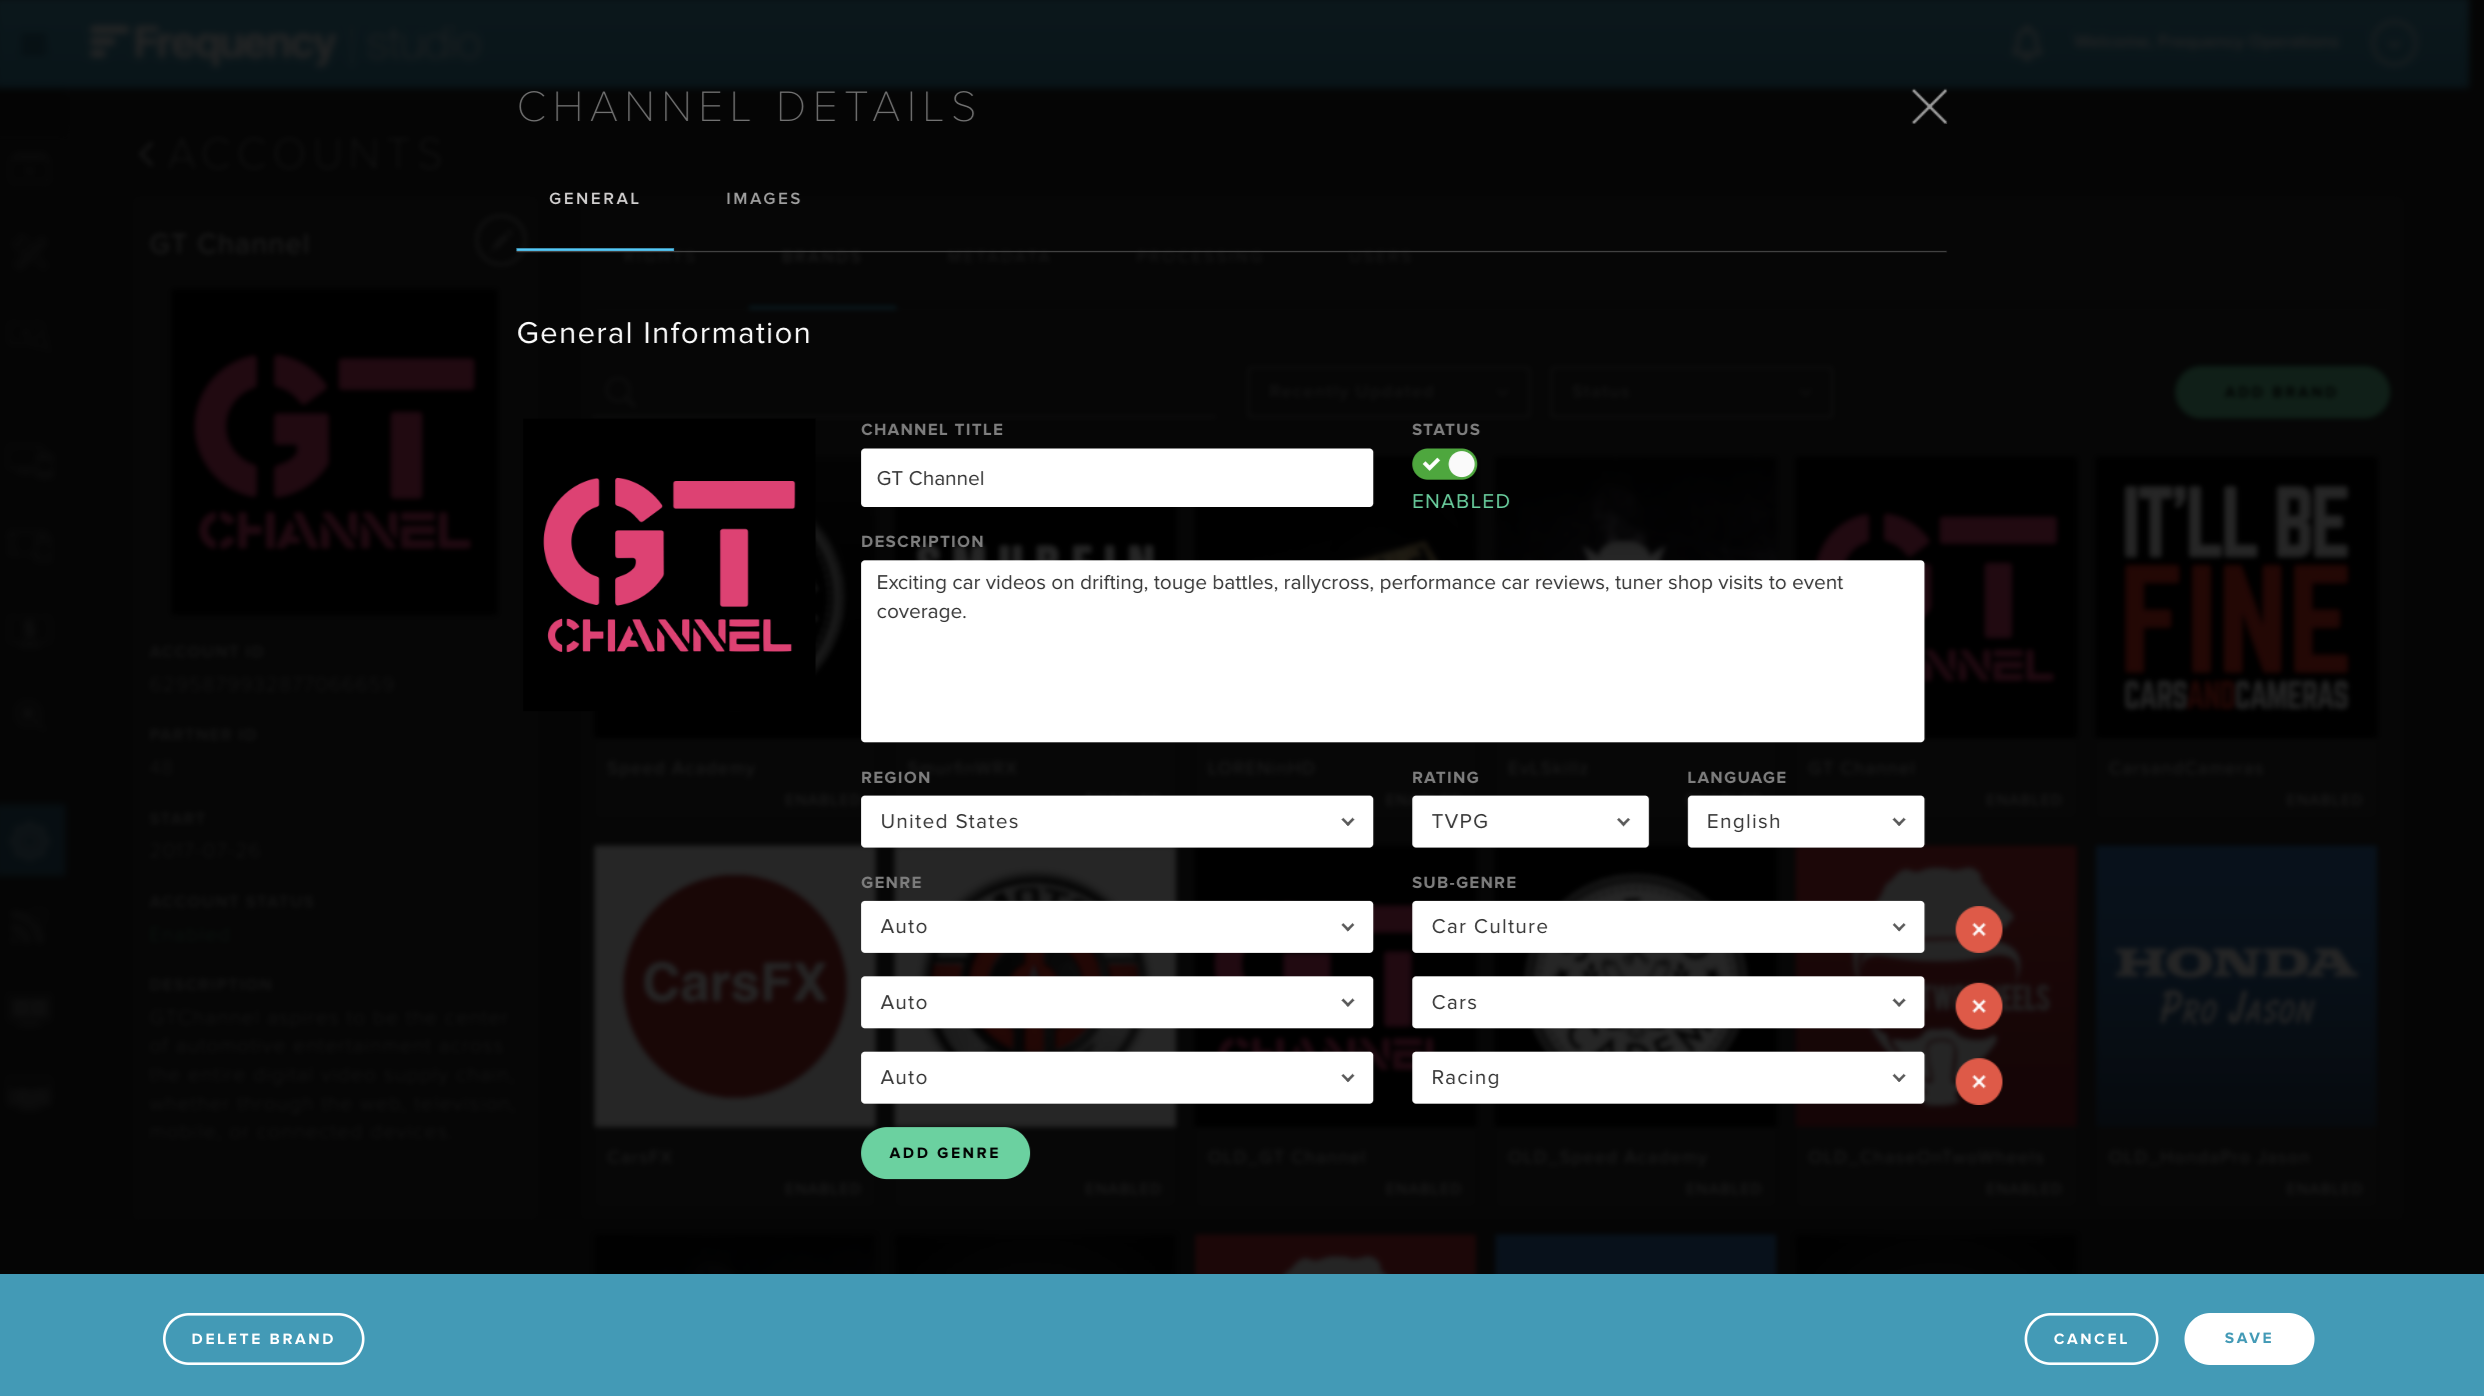
Step 2 of 2: Add Brand Metadata
Fill out the Brand's required metadata:
Title: The title of a brand that is displayed to the end-user when relevant, depending on how the channel is displayed by the consumer-facing application. The title can be as short as 3 characters and as long as 150 characters.
Description: The description of the playlist that is displayed to the end-user when relevant, depending on how the playlist is displayed by the consumer-facing application.
Region: The originating country for this playlist.
Parental Rating: The descriptive rating of the brand. This is used to identify brands that are for mature audience only during a channel search operation. The values for Parental Ratings depends on the Region chosen as different countries will have varying rating agencies and rating values. For the U.S., the following genres are available as an example:
TV-G - For audiences of all ages.
TV-Y7 - For children over the age of 7 years.
TV-PG - For general audiences with parental discretion.
TV-14 - For audiences over the age of 14 years or with parental discretion.
TV-MA - For mature audiences only.
Status: The Brand's status. A green icon means that the brand is active and accessible by the end-user. A red icon means that it is no longer accessible.
Genre / Sub-genre: The genre and sub-genres that generally describes the content that this playlist is intended to carry. Multiple genre and sub-genres are possible per playlist. When choosing a genre, a sub-genre is not required. When choosing a sub-genre, it requires first choice of a genre.
Language: The primary language of the content within this playlist.
View Brand Details
In the main screen for Brands, you can view a brand's details by mousing over your brand and clicking the bullet list icon. You can view the content within a brand by clicking the eyeball icon (This will take you to MANAGE to view the videos within this Brand).
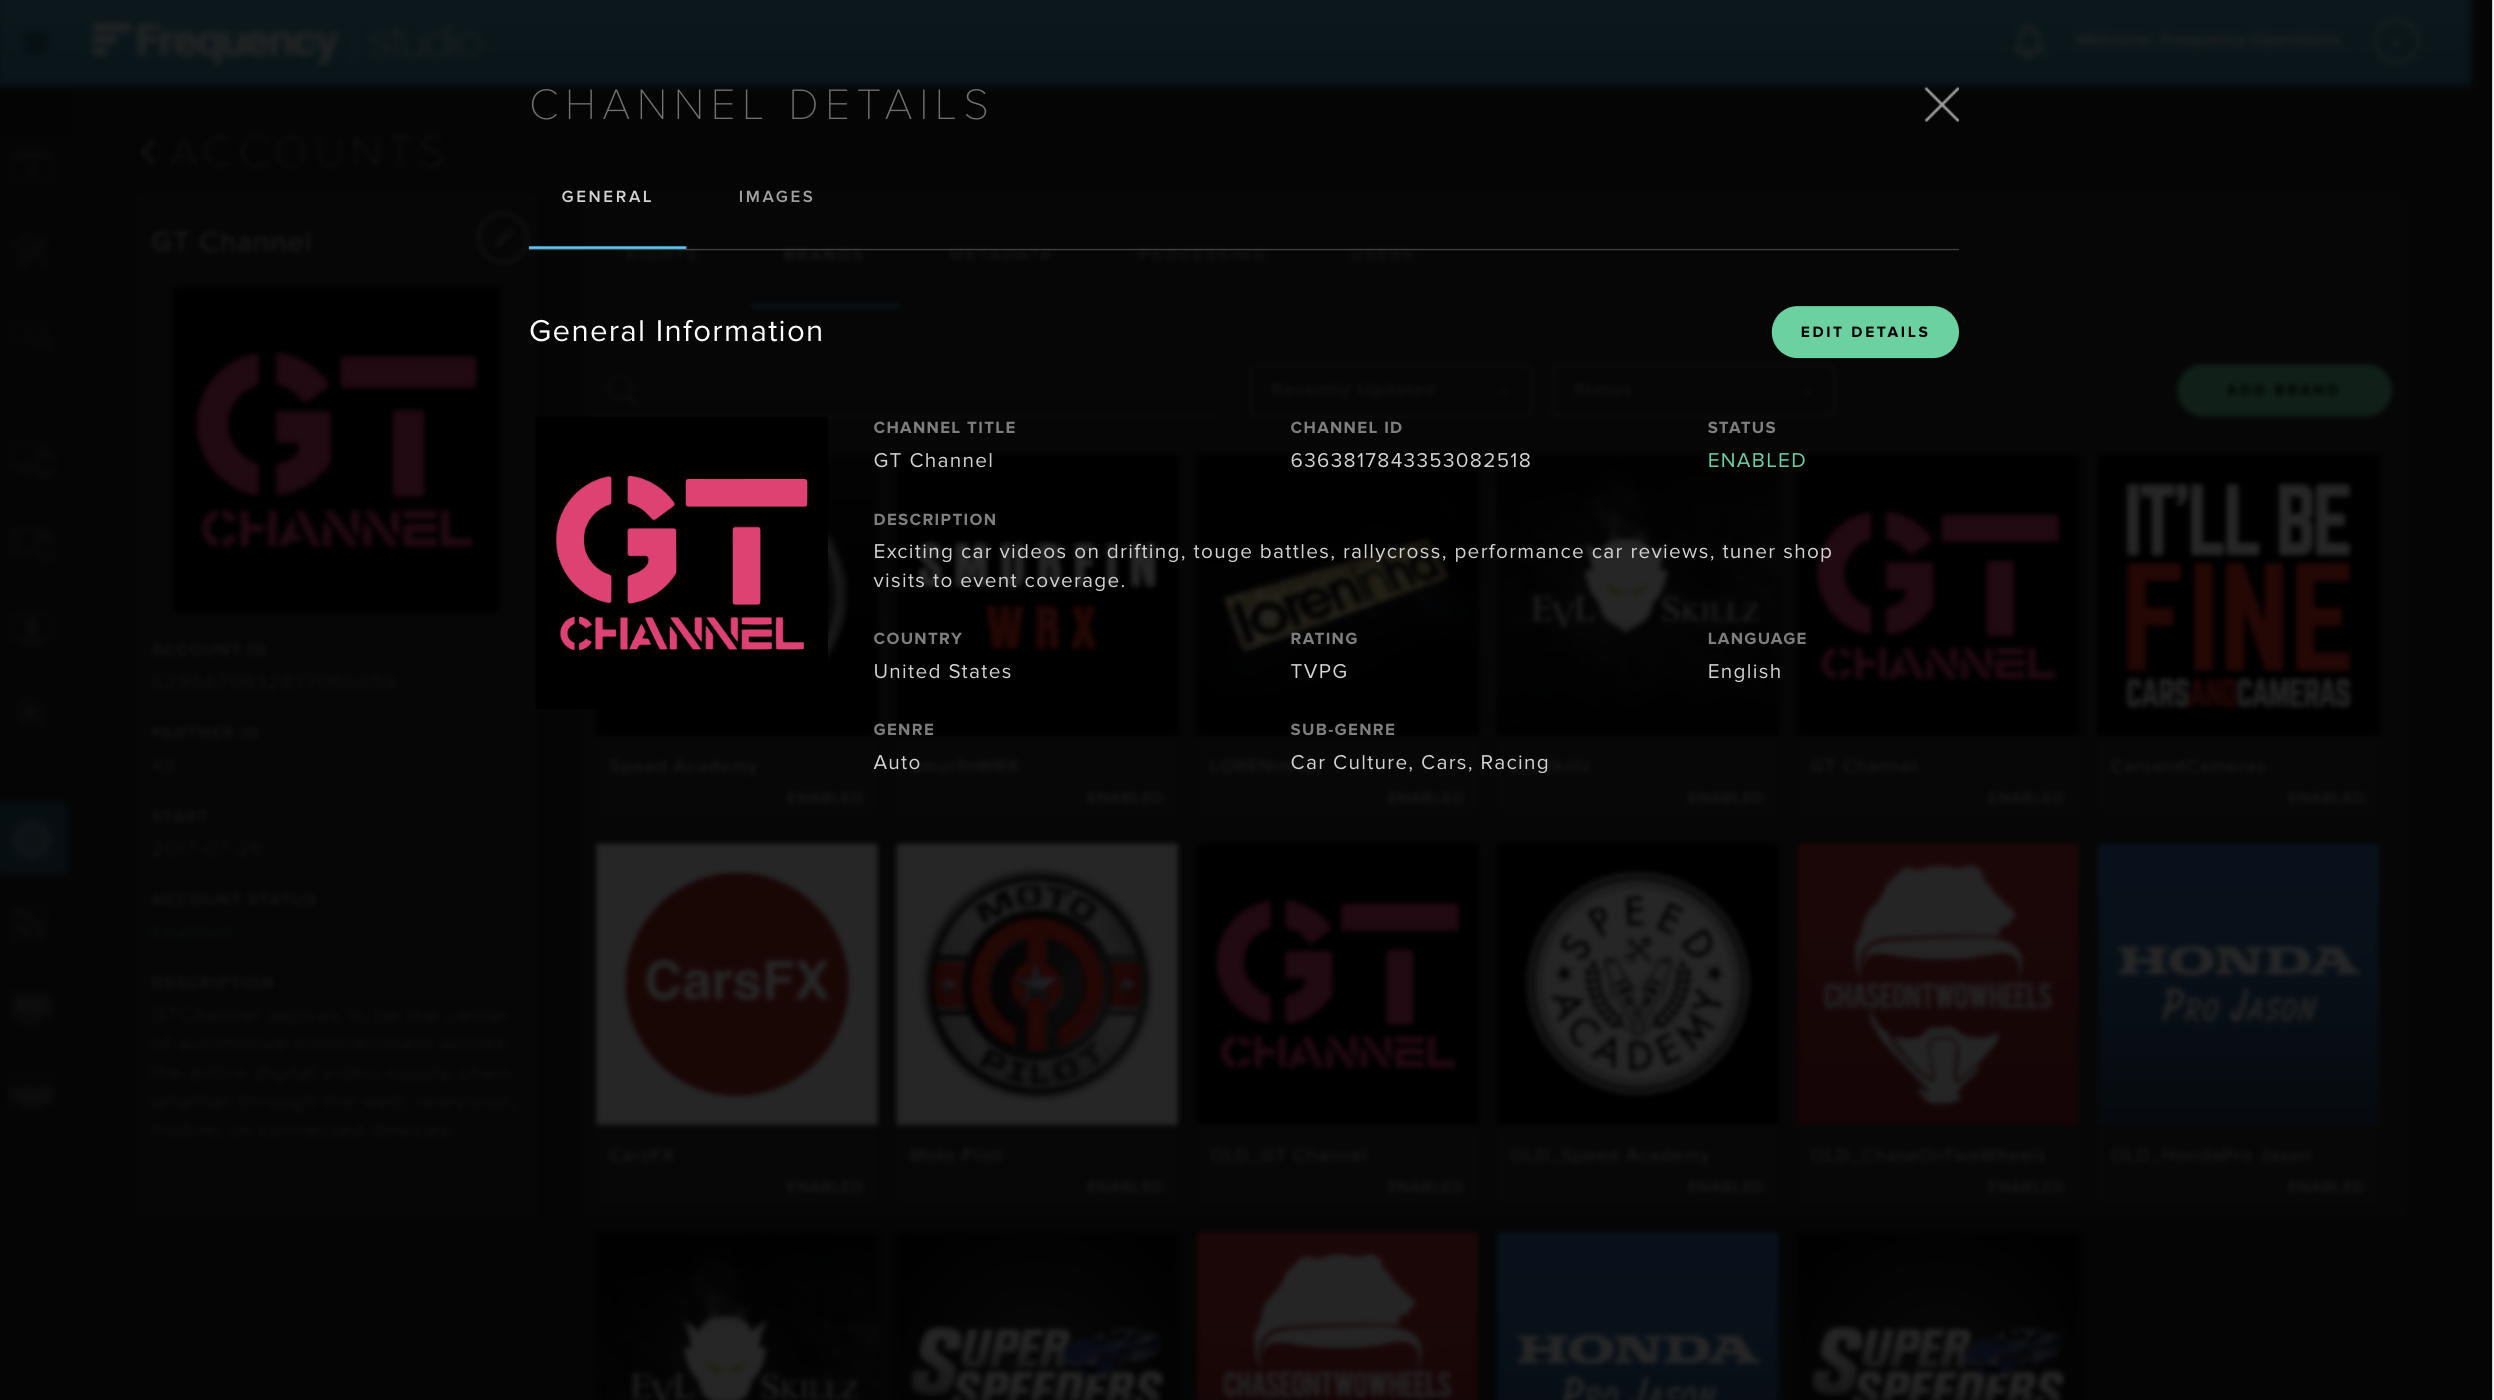 |
Edit Brand Details
General Details
When viewing the Brand Details's General tab, clicking on the Edit Details would allow you to edit the Brand. Saving it would take into effect immediately.
 |
Brand Images
When viewing the Brand Details's Images tab, clicking on the Pencil icon when hovering over one fo the six image types allows you to replace the image. Select the correct image from your computer. Changes take into effect immediately after upload is successful. Refer to Brand Logo Asset definitions/style guidelines above for specifications.
 |